
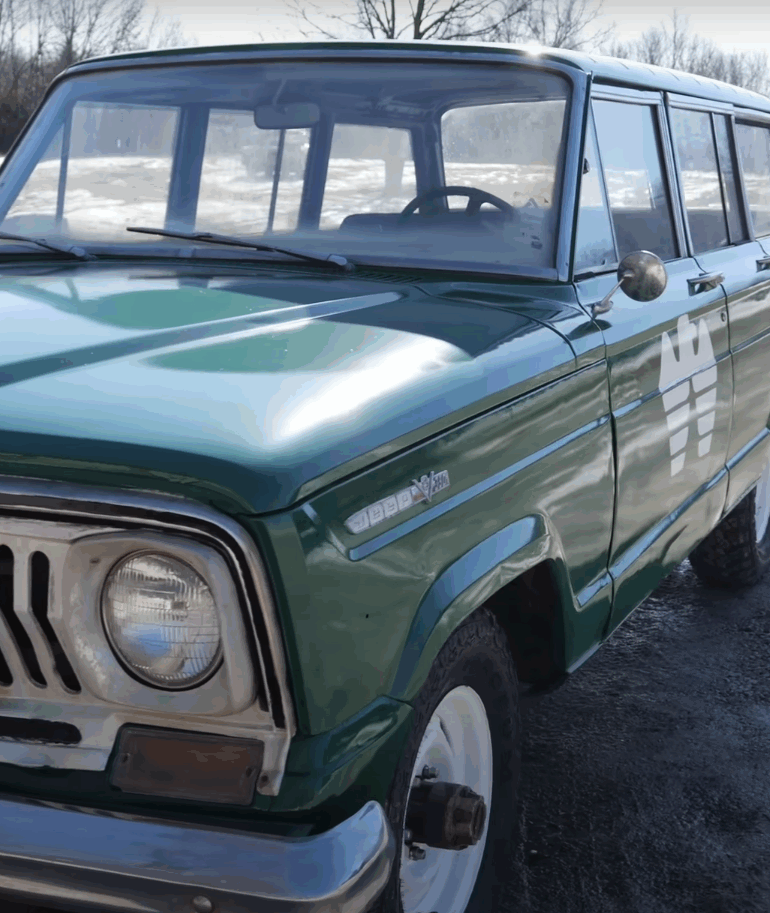
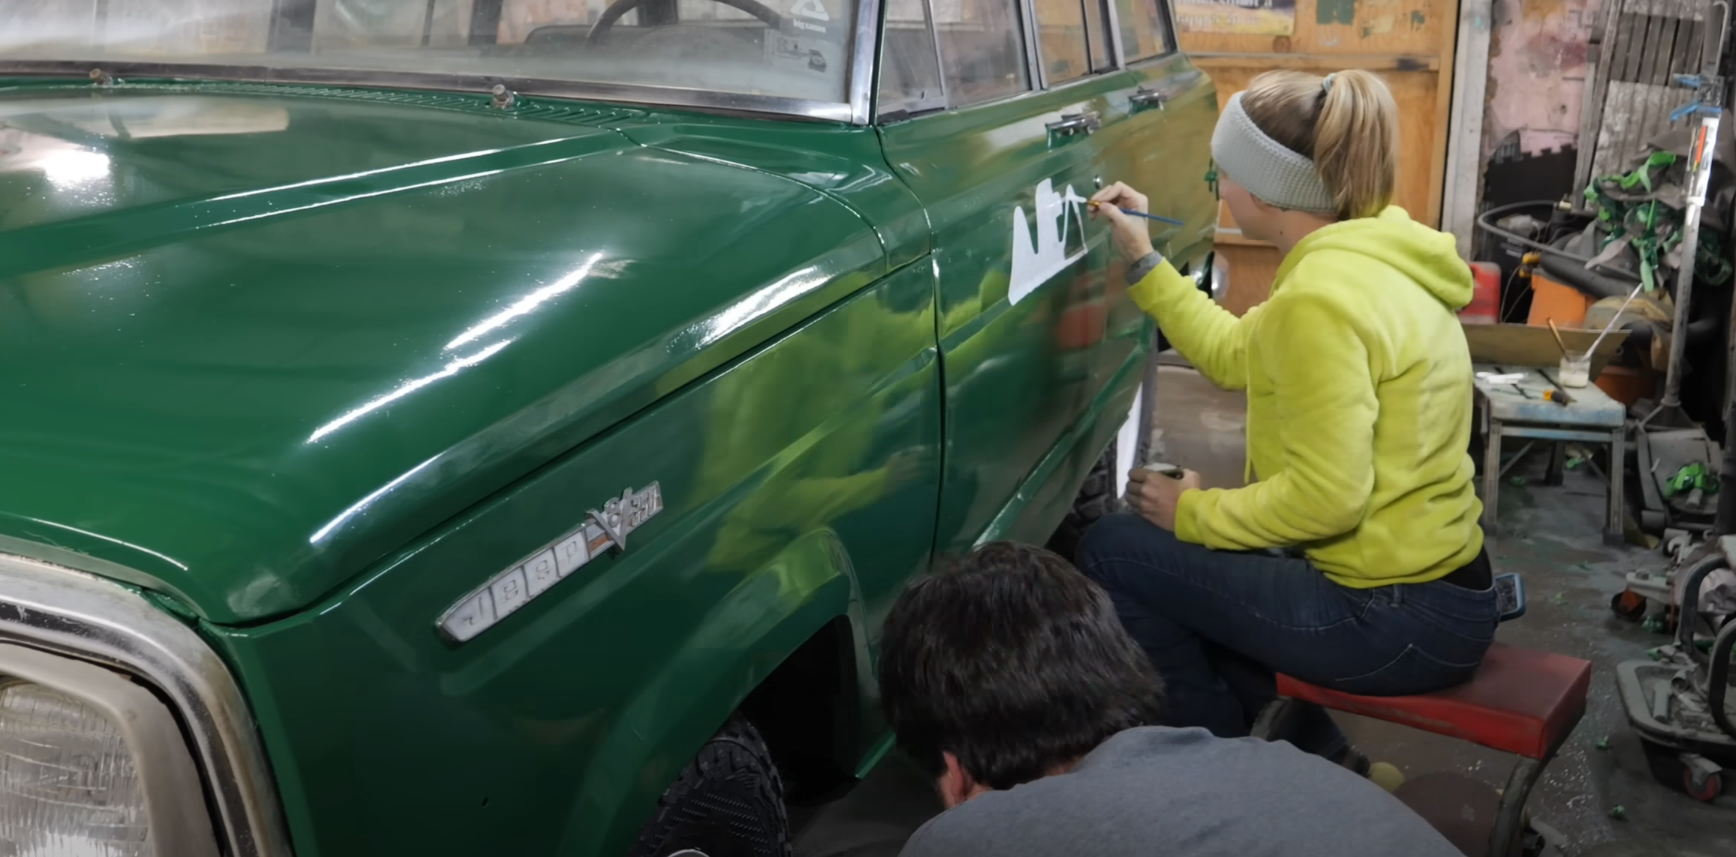
Fixing up a classic car can seem overwhelming, but it does not have to be expensive or complicated. This guide shows how anyone can make an old vehicle look a lot better in just a few days without spending a lot of money. The example is a 1969 Jeep Wagoneer with some rough spots, like cracked paint, rust, and old repairs. Even with these flaws, there are ways to improve its appearance quickly and affordably.
The main steps focus on simple checks, using common tools, and choosing where to put the most effort for the biggest impact. Practical advice helps keep the work easy, fast, and good enough to make the car stand out from a distance. With the right products and basic techniques, even tough areas can look much cleaner, setting the Jeep up for a fresh finish.
Key Takeaways
- Start with a careful check and simple plan for repairs.
- Use straightforward tools and quick methods to prepare surfaces.
- Focus effort on visible areas for the best overall improvement.
Starting Evaluation and Preparation
Checking Over the Jeep’s Shape
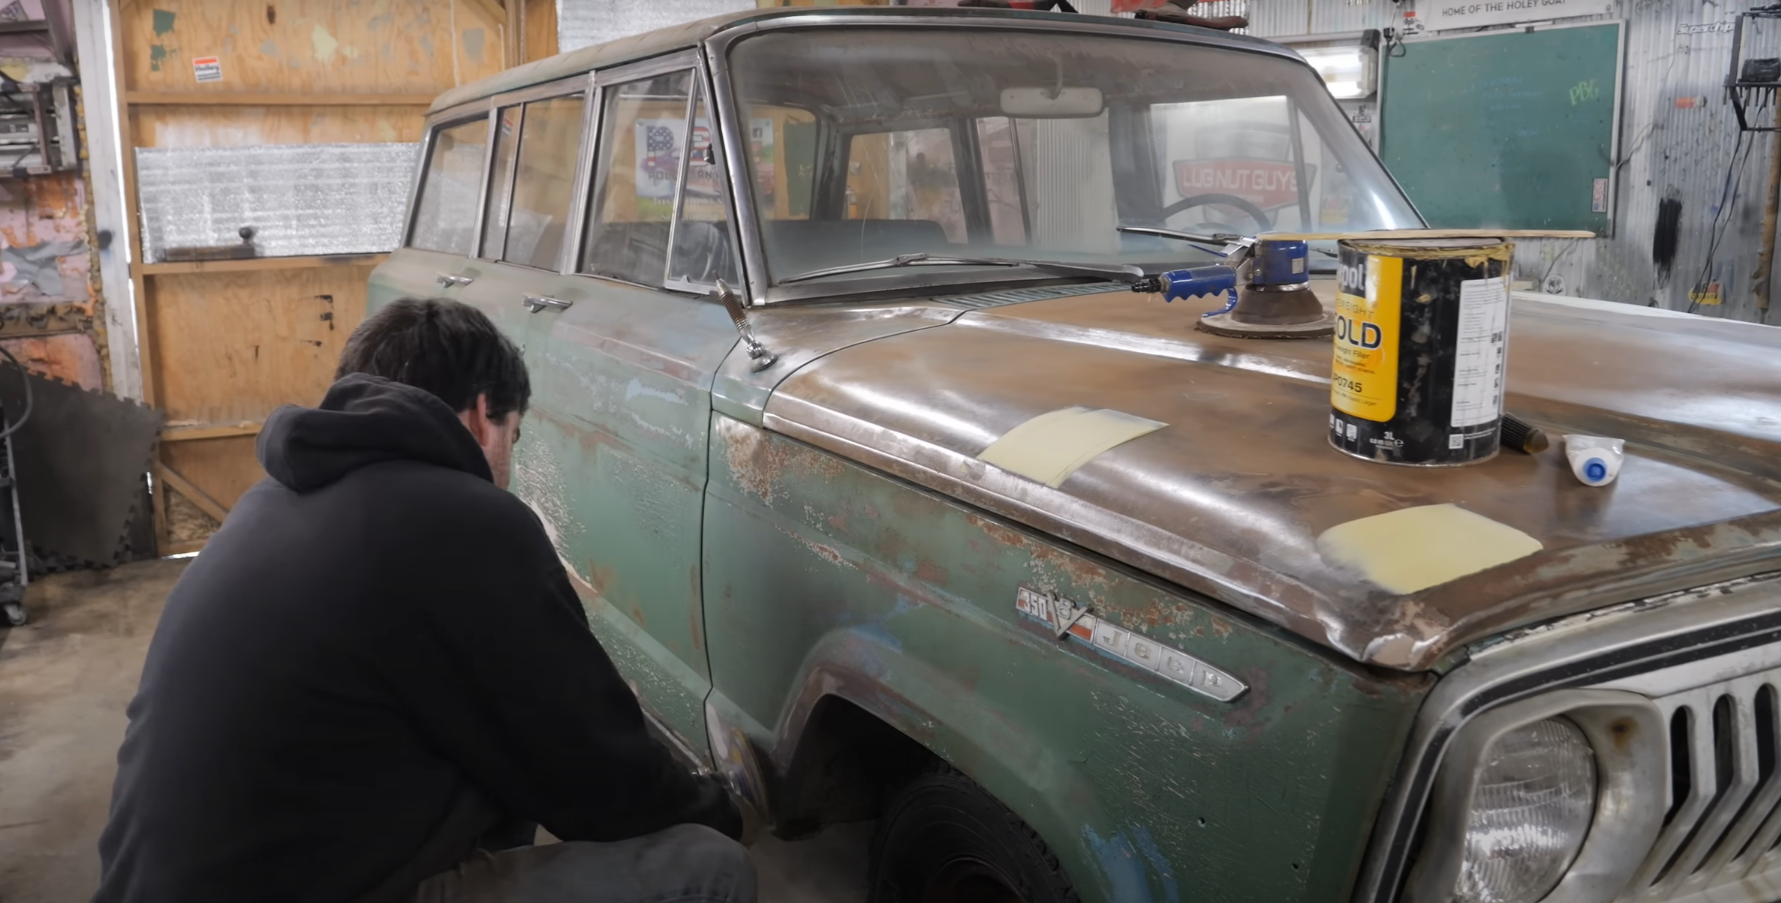
Before any work starts, it’s important to see what parts of the Jeep are solid and which are not. The paint is peeling and has different colors layered on top of each other. Some places have lots of body filler, but areas like the lower quarter panels and the tailgate show signs of rust and damage. The hood is in rough shape and covered with thin filler. Some trim pieces were already sanded and painted, so there is no need to remove them unless it’s easy. Most dents can be marked with a pencil and fixed with basic tools. Focus mainly on the top and more visible parts because those are what people notice first.
| Area | Condition | Plan |
|---|---|---|
| Dog legs | Mostly solid | Leave as is |
| Lower quarters | Bad, rusty | Feather, fill as needed |
| Tailgate | Rust under trim | Leave or feather edges |
| Hood | Rough, skin coat of filler | Feather and fill |
| Rockers | Nearly gone | Do not fix |
| Trim | Already painted | Scuff and paint |
Planning for a Decent Outcome
It’s not about getting things perfect. Small flaws, rough spots, or light rust are fine for this type of work. The goal is to get the Jeep looking good from a distance, not to make it new. It will not be done by book standards, just quick and simple so anyone can do it at home.
- Aim for “good enough”: A clean, smooth upper surface is most important.
- Don’t stress imperfections: Only fix what’s easy and will be most visible.
- Work quickly: Try to get each step done in one go.
Planning Costs and Supplies
A solid result can be done for around $200-250. Most materials are easy to find, and only basic tools are needed.
Materials and Tools Checklist:
- 6-inch DA sander with 80-grit sandpaper
- 8-inch DA sander for quicker sanding (optional, about $120)
- Body filler (suggested brands: UPol Gold or Evercoat Rage)
- Cheap putty spreaders (about 20 per box)
- Hardener for filler
- Masking supplies (tape, paper)
- Primer and paint
- Basic hand tools (hammer, pencil for marking dents)
Tip: Buy only what you need. Use tools for as many jobs as possible before replacing. If a product is more expensive but lasts longer or works better, it’s often worth it for this kind of job.
Must-Have Equipment and Materials
Picking Sanders That Work
A dual action (DA) sander with a 6-inch pad and 80 grit sandpaper is the main tool for smoothing down most surfaces. For rough areas or bigger jobs, an 8-inch da sander can remove layers faster but costs more and is more delicate. Sometimes, 40 grit sandpaper is used on tough spots where a lot of material needs to come off quickly. Using the sander flat against the surface keeps it smooth, but to blend edges, it helps to angle the tool a bit. Locking the sander into grind mode can help with deep scratches, but it wears out the sandpaper quickly.
Table: Sanders and Their Uses
| Sander Type | Best For | Notes |
|---|---|---|
| 6-inch DA sander | General flattening | Use 80 grit for most areas |
| 8-inch DA sander | Heavy sanding, quick work | Costs more, easy to damage |
| 40 grit sandpaper | Deep flaws, leveling | For roughest sections only |
Best Choices for Fillers and Spreaders
For small dents and finishing, he uses inexpensive plastic putty spreaders that come in boxes of 20. They usually last for about four uses, but for a fast job, just two might be enough for the whole project.
The favorite body filler is U-Pol Gold because it can be used right over bare metal, which saves time. Evercoat Rage is also a good choice but usually costs more. He avoids Bondo brand products, as they tend to be lower quality. U-Pol Gold is not cheap, but it’s reliable for this type of work.
List: Filler and Spreader Recommendations
- U-Pol Gold filler (main pick; direct-to-metal)
- Evercoat Rage filler (also works well)
- Avoid Bondo brand fillers
- Plastic putty spreaders (Harbor Freight, affordable and reusable)
These tools and products allow anyone to clean up an old paint job or prep for new paint without a big investment or special skills.
Getting Surfaces Ready for Paint
Finding Main Trouble Spots
Before doing any sanding, it is important to look over the whole vehicle. Most of the time, problem areas are easy to spot. They often include spots with flaking paint, cracks, or old patches of filler. Surfaces at eye level, like the hood, get the most attention because people look at them first. Lower areas like the quarters and rockers get checked, but minor flaws down low do not matter as much for a budget job.
A quick checklist to spot key issues:
- Peeling or cracked paint
- Areas with old or thick filler
- Visible rust or bubbling
- Sharp edges or dents
Trim pieces can also hide damage or old repairs, so it’s a good idea to check under or around them if possible.
Smoothing and Blending Techniques
When it’s time to sand, using a dual-action (DA) sander with 80-grit paper does the bulk of the work. The main goal is to flatten high spots, blend out rough edges, and feather any sharp transitions. For tough jobs, sometimes 40-grit and a bigger sander work faster, but they can be harder to control.
Some helpful tips:
- Keep the sander flat for most jobs.
- Angle the sander slightly when trying to feather an edge.
- Focus on soft, smooth edges—hard lines or ridges will show through new paint.
Feathering is key for a budget-friendly job. A gentle edge blends better under paint than a sharp change. Use the “lock” mode on the DA for deep scratches, but be careful not to dig in too deep or wear out the paper too fast. Quick checks with a hand or fingertip help feel if spots are smooth or still rough.
Dealing with Rust and Deep Pits
Rust and pitting are common on older vehicles. While professional jobs call for grinding out all rusty spots, for a fast project, the focus is on cleaning up surface rust as much as possible. Heavy pits or deep rust, especially under the trim or at the bottoms of panels, may get filled and sanded, but not always removed completely.
Typical steps for rust spots:
- Brush or sand loose rust and paint away.
- Apply a skim coat of filler over pitted areas.
- Sand until smooth and feathered.
- Mark bigger dents or pits with a marker or pencil before filling, so nothing is missed.
If dents pop back up while sanding, use a small hammer to tap them back down before adding filler. For this type of “weekend job,” not every pit or rust spot is fixed perfectly, but most rough patches can be leveled out and prepped for paint.
Best Ways to Use Filler
Mixing and Putting On Filler
Before using any filler, always check if it is still good. Filler can go bad after the can is opened, but it will often work fine for a simple project like this. When mixing the filler, do not stir it. Instead, fold it together for a better mix. The usual measure is about a nickel’s size of hardener for every dollar-bill size of filler. In cold weather, adding a bit more hardener helps it set faster.
Cheap plastic putty spreaders work well and can be reused several times. Use the spreader to put on a thin, even layer. Focus mostly on easy-to-see surfaces like the hood. Aim to fill dents and low spots in one go so you don’t have to redo spots.
| Step | Tip |
|---|---|
| Choose filler | Use direct-to-metal types for best hold |
| Mix filler | Fold, do not stir |
| Apply filler | Use thin, even layers with cheap spreaders |
Working on Dents and Rough Spots
Surface dents can often be popped out with a hammer. For small dings, mark them with a pencil after you find them with your hands so you remember to fill them. Big cracks or sharp edges need extra attention. Feather the edges with a sander so they blend with the rest of the panel.
For deep scratches, use a sander’s lock mode for quick material removal, but be careful—sandpaper will wear out fast. The goal is to make soft, smooth edges rather than hard lines. If the edge is still sharp after sanding, it will not be hidden by paint.
- Mark all dents to track repairs
- Pop out larger dents before filling
- Feather hard edges smooth to avoid ridges later
- Spend most time on the areas people see first
Remember, a quick weekend fix does not have to be perfect. Focus on smoothness and easy-to-see spots to get good results fast.
Practical Tips for a Smoother Workflow
Focusing Efforts on Eye-Level and Key Surfaces
He recommends spending most of the time on parts of the vehicle that stand out the most to anyone looking at it. This means concentrating on areas like the hood and the upper sides—places your eyes see right away. Surfaces at eye level or that catch attention should get the smoothest bodywork and the most sanding so the car looks its best from a distance.
Quick List: Where to Prioritize
- Hood
- Roof
- Upper door panels
- Upper sides
Less obvious spots, like the lower quarters and rockers, aren’t as important for a quick makeover. These spots can be fixed up fast, since they won’t be as noticeable.
Deciding Between Speed and Trying for Flawlessness
He points out that with a limited budget, it’s not realistic to aim for perfect results everywhere. For a basic project, quick solutions—like feathering out rough spots and just smoothing over cracks—are good enough. Trying to get every area perfect takes too much time and isn’t needed for a casual fix-up.
Quick Fix Approach
- Fill and feather once, then move on
- Leave some surface rust or minor dents if they won’t show much
- Use fewer tools and only essential products
Trying too hard for perfection can make the job drag on. For a solid improvement that looks good from “20 feet away,” it’s better to accept small flaws and work fast. If something isn’t working after one pass, it’s probably best to leave it and keep moving. That way, the whole project can be done in a weekend, and the car will look much better for the time put in.
Last Steps Before Putting on Paint
Washing and Covering Up
Before adding any paint, it’s important to get rid of dust and dirt on the surface. Use a clean cloth or rag to wipe everything down, especially where you did sanding. Make sure all loose particles and sanding dust are gone.
After cleaning, anything that should not get paint needs to be covered. Use painter’s tape and plastic or paper to mask trim, windows, badges, and lights. Double-check the tape edges so paint does not leak under.
- Tools Needed:
- Clean cloths or rags
- Painter’s tape
- Plastic or paper sheeting
| Step | What to Use |
|---|---|
| Clean Surface | Cloth/rag |
| Mask Areas | Tape, plastic sheet, or paper |
Set to Start Spraying
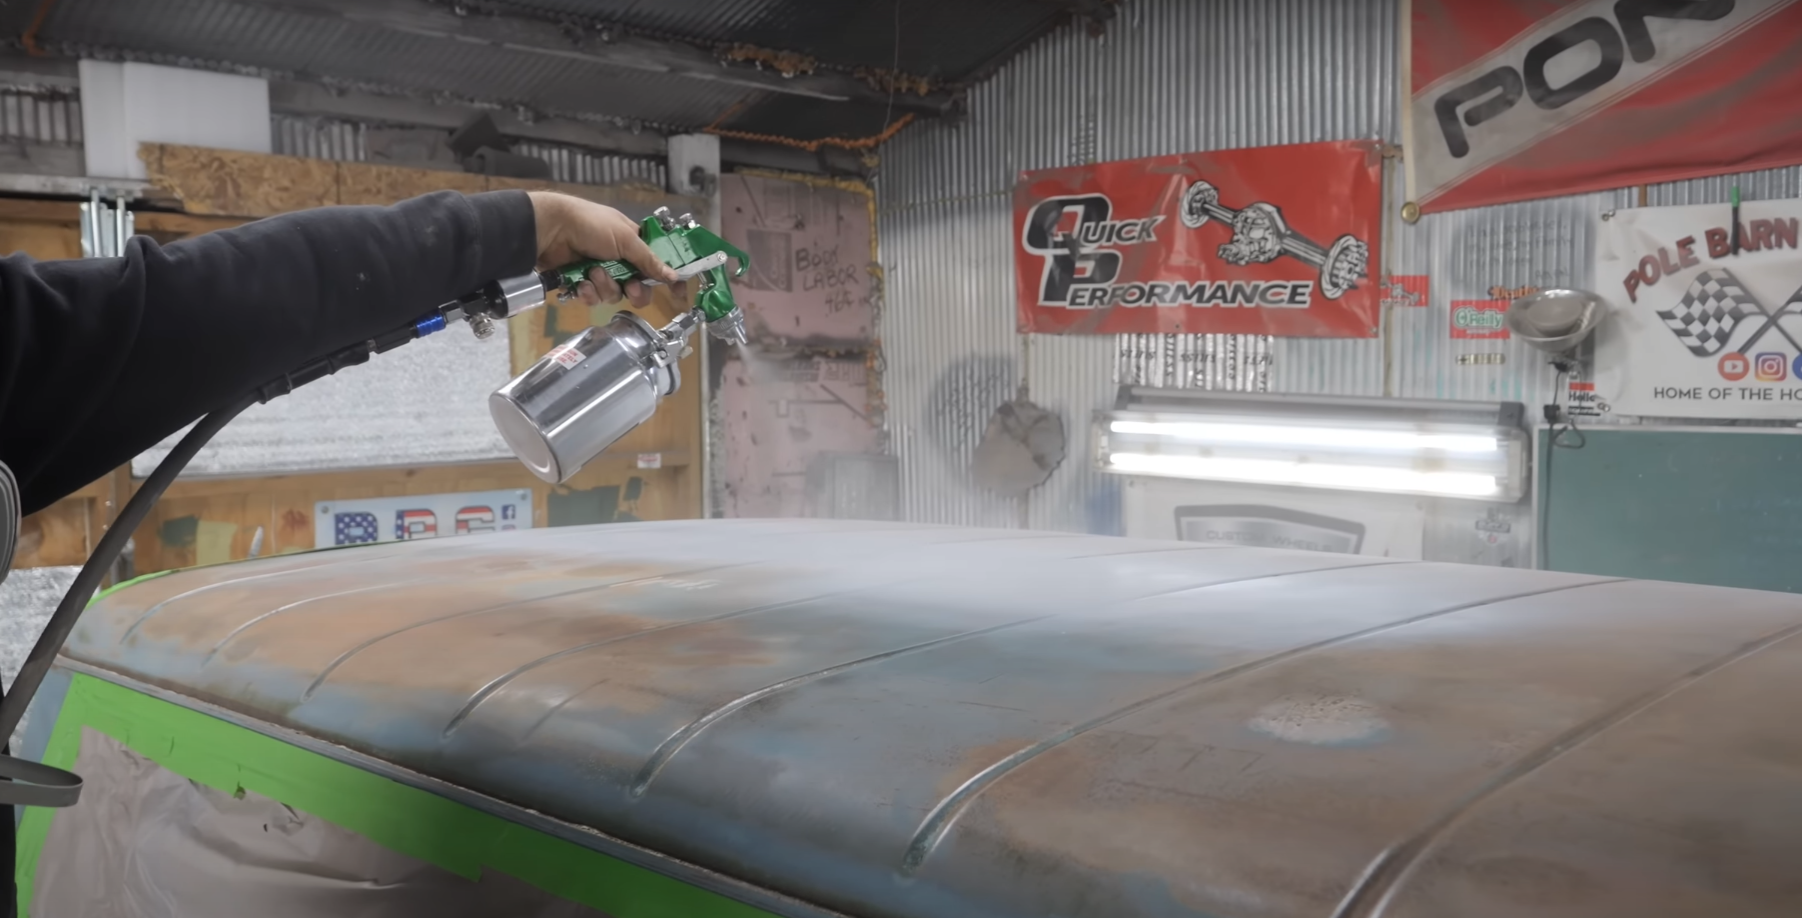
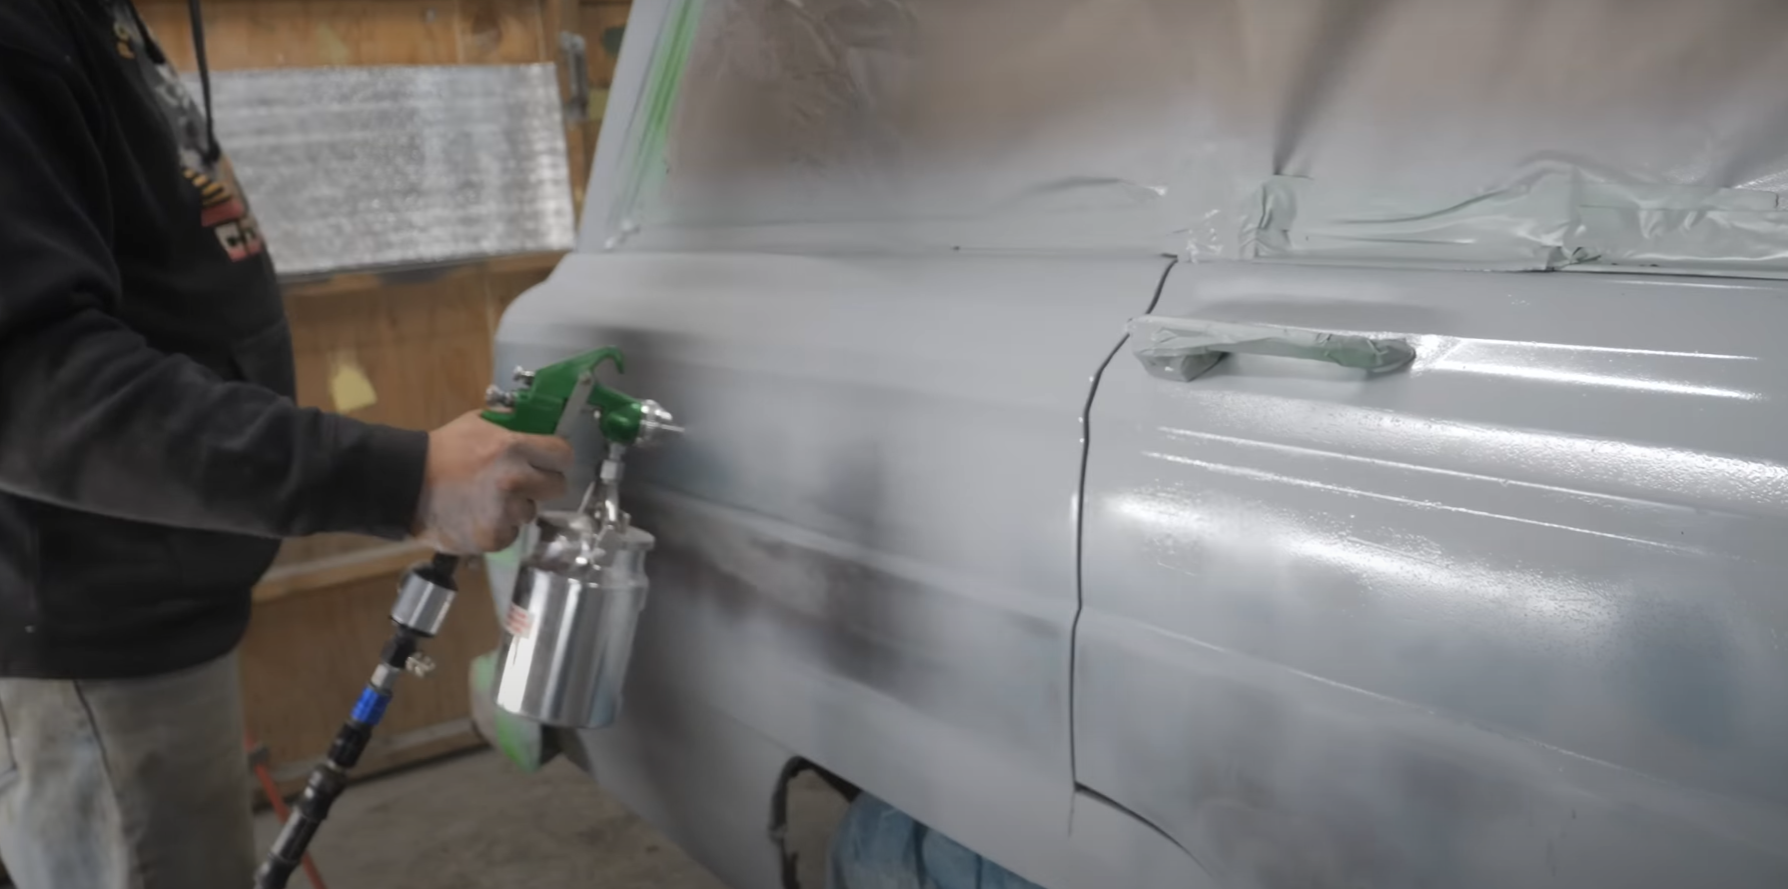
Once everything is clean and covered, check to be sure the surface is dry. Walk around the vehicle to see if you missed any spots with tape.
Shake the paint before you use it. Have your spray gun or paint cans ready, and if you are using primer, make sure it is mixed well. Line up all your materials so you don’t have to stop once you start painting.
Checklist:
- Surface is dry and free of dust
- All areas you don’t want painted are masked
- Paint and tools are ready to go
You are now ready to begin painting.
Final Thoughts
Working on the 1969 Jeep Wagoneer, the focus is on getting it to look good from a distance for an affordable price. The paint shows several layers with visible flaking and checking. The original blue is under a couple of green paint jobs, and there are areas with body filler and rust, especially on the lower quarters and hood.
Key Steps Taken:
- Checked the vehicle to see which sections needed the most attention.
- Used an orbital sander with 80 grit to smooth the majority of surfaces.
- Spent the most time on upper, eye-level areas, like the hood, to improve appearance where it’s most noticeable.
- Flattened and feathered edges around cracks and old repairs to make transitions less obvious.
- Handled heavy pitting and rust with quick sanding but did not pursue complete removal.
| Part | Condition | Approach |
|---|---|---|
| Dog Legs | Mostly solid | Light sanding |
| Lower Quarters | Bad | Surface smoothing |
| Tailgate | Rust present | Minimal attention |
| Rockers | Missing | Not addressed |
| Hood | Rough, cracked | Main focus, filled |
A DA sander and feathering technique help get the best results quickly, even if it isn’t perfect. Some dents were knocked out by hand or hammered flush, with pencils marking spots that needed filler.
The process uses affordable tools and fillers, focusing on results that are “good enough.” Name-brand fillers that go direct to metal are preferred. The goal is an easy, weekend transformation with a clear improvement that does not require professional-level bodywork.
Tip: Only worry about problem areas that stand out at a glance. Many flaws are left alone to save time and effort. This method is practical and realistic for older vehicles with a low resale value.