
If you are at all into wheelin’, you probably know that reduced tire pressure provides you with better traction, among other things. Running low tire pressures also allows the tire to conform to those sharp rocks and thus reduces the chances of you shredding a tire. But….once you are at the end of the trail, you need to fill those tires back up to their normal street pressure before heading for home. Running reduced tire pressure on the street is NOT something you want to do. A regular air tank, filled from the garage air compressor, does not hold enough air to fill those meaty off-road tires. If you do not wish to install a belt driven York compressor under the hood and a 12V compressor is not on your list of priority mods, then you might want to consider a CO2 tank.
Powertank offers a variety of ready built CO2 systems. They are rather expensive, in my opinion. However, I’ve never heard anyone complain about the quality of the equipment so it appears you are getting what you pay for. The Powertank also comes with a couple of things I do not consider necessary, such as the gauges. CO2 tanks maintain a relatively constant tank pressure until just seconds before they are empty. As such, a high pressure gauge connected to the tank is of little use. It will indicate the tank has good pressure until it is just 15 seconds from empty. Wow, that’s really valuable information when you are out on the trail. Unless you plan on running an adjustable regulator (more about later), having a gauge to monitor the output pressure is also of no use. The Powertank web site has some good reading info on it and I suggest anyone thinking about a CO2 system to spend some time and browse the site.
You can make your own CO2 system, skip the middle man, and pocket the money you save. You don’t need any special tools for this project (now that is nice for a change!) and once you have purchased the parts, it should only take you a few minutes to assemble it into a working CO2 system. I’ve heard that tanks can be had on eBay and such places for a very reasonable price. As with so many Jeep related projects, take you time, do your homework, and you should be able to save some money and end up with a job well done.
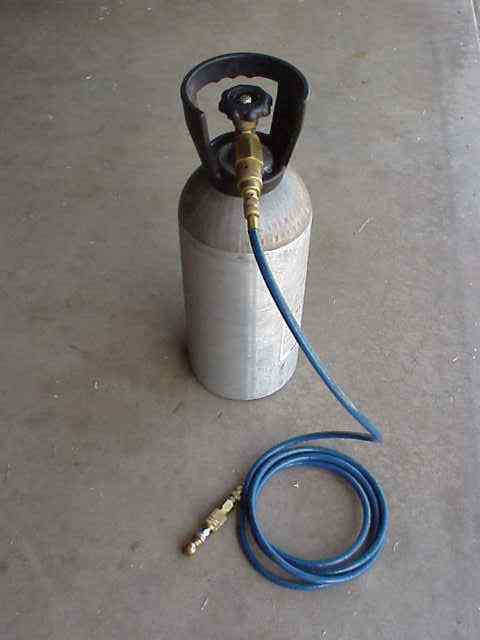
Here is my CO2 system. It consists of a 10# aluminum tank, fixed pressure regulator, and delivery hose. The remainder of this write-up will go into a little more detail about the system and safety features. Let’s take a look at what I have used on my CO2 system. This write-up is not attempting to tell you what is best or what components you must purchase. Instead, I hope to provide you with enough information that you will be able to put together a CO2 system that will suit your needs and not cause you to spend more than is necessary.
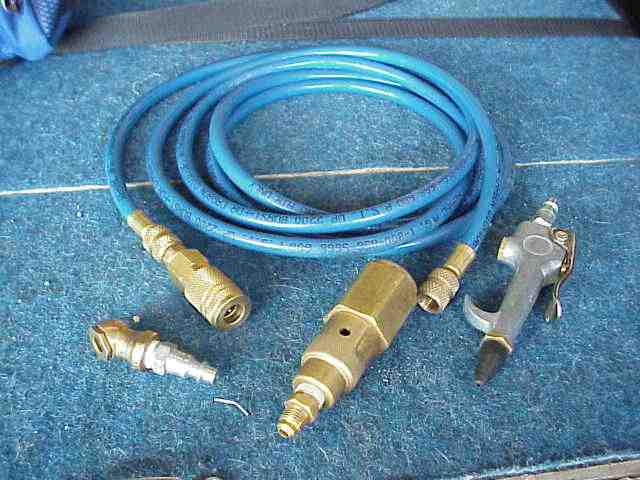
Here is the hose, pressure regulator, tire chuck, and blow nozzle that I use on my CO2 tank. The air chuck, blow nozzle, and quick disconnects that attach them to the hose were obtained from the local ACE Hardware store. Nothing fancy there…..these are the same ones you would use on any regular air tank. While the primary use of this CO2 system is for filling my TJ’s tires, I have to admit that the blow nozzle is pretty handy for getting those dust bunnies out of the inside of the PC!
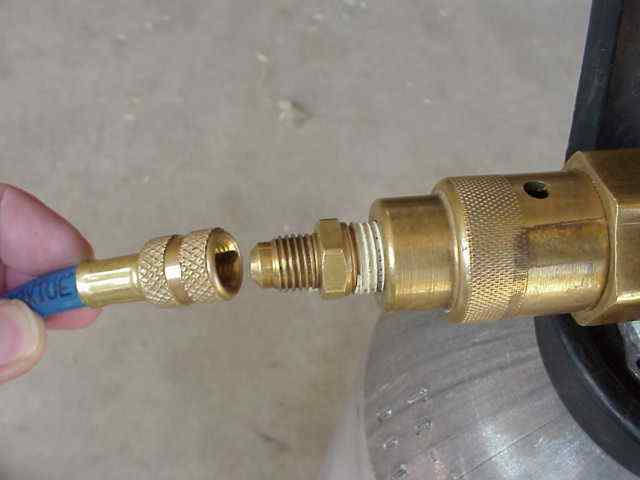
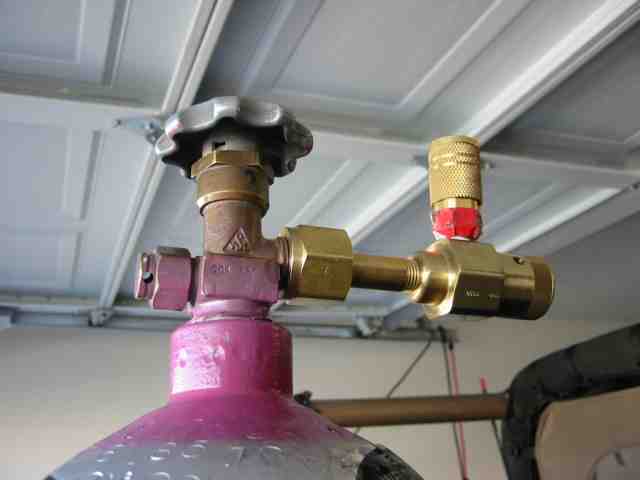
I bought my CO2 system from a friend of mine who had won it in a raffle. It had been assembled by a CA company who specializes in a variety of gas products. As such, my tank was put together with, what I believe to be, better quality components than the average hardware store variety project. Here is the fitting that attaches the hose to the regulator. It is a screw on fitting that only needs to be finger tight in order to have no leaks. The fitting has special grooves cut through the threads that safely bleeds the pressure when you unscrew it (after use).
The regulator is a fixed pressure unit that provides approximately 150 PSI output. I don’t know the flow rate (they make high and low flow regulators) of this regulator but it does a good job on filling tires. If you require a specific output pressure form the regulator, such as 90 PSI for an ARB air locker, you will want to spend a few more dollars and purchase an adjustable regulator with an output pressure gauge. A good friend of mine uses his CO2 system to power his ARBs and it works great. He has a small (low flow) regulator that cost him about $25. It is on the end of a quick disconnect fitting so he an easily connect it to the CO2 tank when he hits the trail and uses his lockers. At the end of the trail, he pops the hose (going to the adjustable regulator) off the tank and uses it to fill his tires. The small adjustable regulator is fed from the 150 PSI fixed regulator. Doing it this way allows him to leave the fixed regulator connected to the CO2 tank all the time.
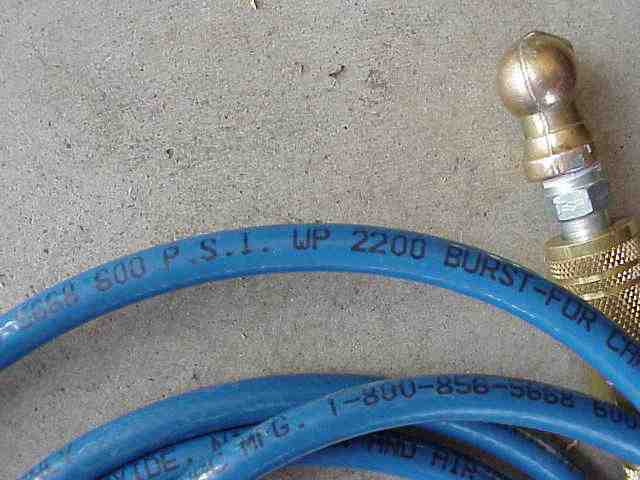
The hose I use is specifically made for CO2 and nitrogen tank systems. As can be seen in the photo above, the working pressure of the hose is 600 PSI and the burst pressure is 2200 PSI. These ratings are probably over kill considering the hose sees just 150 PSI when the CO2 system is in use. However, if my regulator were to fail open (I don’t know if the design would allow that to happen), the hose should survive the regulator failure. Normal tank pressure is in the 700 PSI range.
I got my buddy to snap a picture of his CO2 tank. His does not have the handle/valve protector on it like mine does. This is a typical steel tank that is exchanged for a full tank at the local weld shop. The regulator is a fixed pressure regulator (brand unknown).
CO2 Tank System
Speaking of normal tank pressures, I’ll pass along the details of a situation I experienced just last summer. It involved a trip to the local welding supply store that I had been frequenting for a number of CO2 refills. The weld shop was only about 3 miles from my house and unlike many shops, they would fill your tank while you waited. Many of the other shops would only exchange your tank for a filled tank. When you have a nice aluminum tank with a cool carry handle on it, the last think you want to do is exchange it for beat to crap steel tank. Because of this, I continued to use this shop for my refills.
It was mid summer, which means it was over 110 degrees, here in Phoenix. I stopped by the weld shop and they filled my 10# tank. I drove home and set the tank on the work bench in the garage. About 3 or 4 hours later, I heard this roaring noise that sounded just like a freight train. It took me a couple of seconds before I realized what it had to be…..my freshly filled CO2 tank had cut loose and was venting excess pressure.
Now you have to realize that the excess CO2 gas does not simply vent until it is back to a safe pressure….instead, it begins venting and continues until the tank is completely empty (and not to mention cold enough to freeze the brass nuts off a steel bridge!).
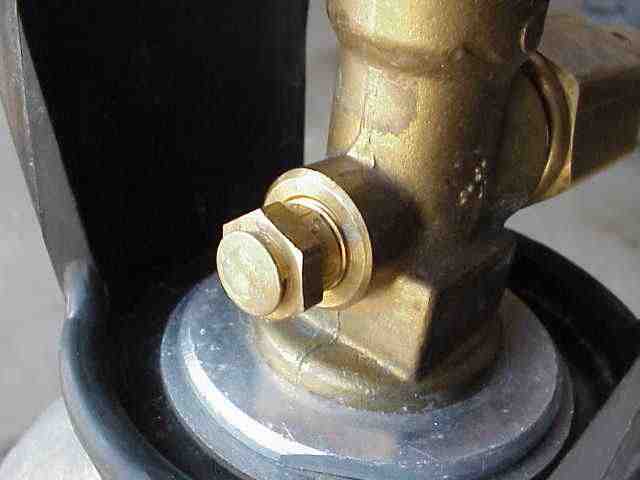
Here is a picture of the safety relief that all CO2 tanks have. Yours may look a little different, but it will serve the same purpose….if the pressure gets too high, it will blow out and release pressure.
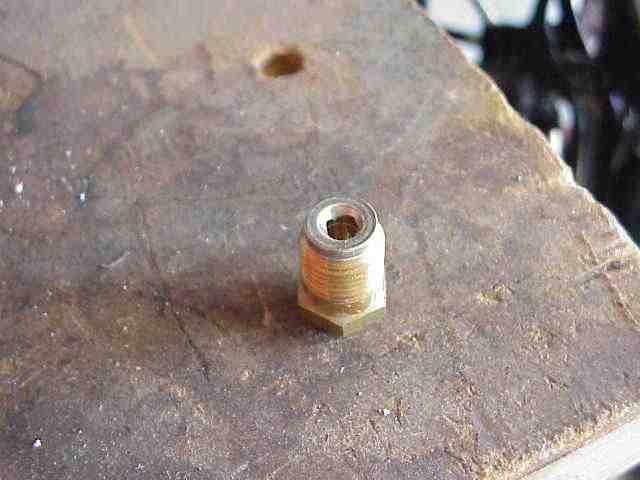
If it ever should blow, you will have to replace it. They unscrew from the valve assembly and the business end of it looks like this. The hole is the result of the pressure building up and eventually rupturing the thin metal burst disc. My relief was rated at 3000 PSI…..WOW….that is a bunch of pressure when you consider that the normal working level is around 700 PSI. What caused the pressure to spike so high?
A 10# CO2 tank will hold 10# of CO2 when it is properly filled. I stress the word properly because an overfilled CO2 tank, when subjected to summer time temperatures, will quickly build up enough pressure to blow out the 3000 PSI burst disc. When my burst disc blew, I contacted the company who had built my tank (for a replacement) and spoke with one of their top employees. By then, I had heard all manners of horror stories about CO2 tanks blowing up in the Phoenix summers, etc. He assured me that a properly (there is that word again) filled CO2 tank can be half buried in the Mojave desert, all summer long, without any chance of it venting. It is not until the tank is overfilled AND ambient temperature is high that the recipe for a blowout is cooked up. I found some related CO2 tank filling info on the Internet but I will admit it was too technical for me to fully grasp. It went into detail as to how the pressure spikes, based on the percent of overfill and the temperature (among other things discussed). I was able to glean enough from it that I felt comfortable with what the gas tech guy told me on the phone.
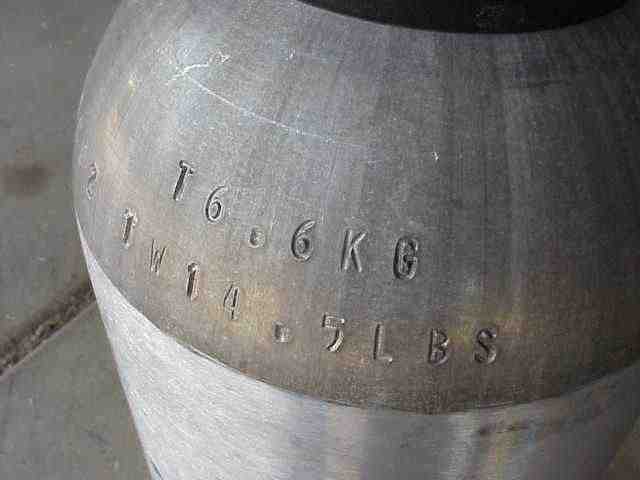
By now, you should be asking yourself how YOU are going to avoid getting yourself into this kind of situation. After all, you are putting significant faith into the abilities of someone that you probably don’t know and hopefully can count to 10 when he fills your CO2 tank. One thing that I was NOT doing before my tank venting scenario but now do after fill up is to simply weigh the tank. The above shows the tare (empty) weight of my aluminum tank, which is 14.5 lbs. That means that the tank should weigh 24.5 lbs. after it is filled. If it weighs more than that, I would hook up the regulator and hose and bleed some CO2 off before the burst disc decided to do its thing. Just weigh your tank before you take it to the store for a refill and immediately weigh it when you get home. I would suggest that you don’t do this first thing in the morning and then not plan on weighing it until later in the afternoon. On a warm day, that will be more than enough time for the pressure to build on an overfilled tank. Please understand that I am NOT attempting to scare the dickens out of you and keep you from using a CO2 tank. Actually, it is quite the contrary. I want you to be fully aware of a CO2 tank’s operation so you can properly use it without fear of it having a problem.
CO2 is an outstanding portable air source. My used CO2 system ran me $100 (tank, regulator, and hose). I’ve used it on the trail, in the garage, in the house, and at the parking lot. If you decide to go with a CO2 tank, I hope you enjoy yours as much as I have mine.
P.S. In case someone was wondering, I stopped using that welding supply shop. I went back the following day and requested a refund of my money. I was politely informed that it was my fault the tank over-pressured…..the idiot behind the counter claimed I should not have stored it in my garage. I asked him about all of the CO2 bottles at his store that sat outside in a non air-conditioned storage shed….DUH…..he couldn’t think of a good come back for that one! I now have my tank filled at a commercial fire extinguisher shop….they have yet to be a problem….and one of the employee that works there thinks my TJ is pretty nice. How can I go wrong?
CO2 Tank System
OK…..so you got your CO2 tank assembled and you’ve checked it out. It is working awesome, right? Super! Now…..what are you going to do about that plain looking tank? What, you haven’t given that any thought? Oh oh….wrong answer. You gotta dress it up a little bit. Besides, we all customize our Jeeps….you certainly don’t want your CO2 tank looking like the CO2 tank in your buddy’s TJ, right? Here is what mine now looks like.
Through the wonders of the internet, I hooked up with a Jeeper named Todd who also happens to be interested in scuba diving. (I’m certified but its been about 15 years since I last was in the ocean with a tank on my back.) Anyway, Todd is also a graphic artist and he designs and sells his “Scuba Hides” to the scuba diving crowd.
Scuba Hides are a non-adhesive 2-ply tank cover. The graphic is printed on a 10 mil thick sheet of polyethelyne which is placed around the tank without any adhesive. A transparent 5 mil thick shrink-wrap sleeve is then slipped over the tank/graphic. This outer sleeve is shrunk-to-fit with a regular hair dryer. Because the graphic is under the protective sleeve, the graphic does not rub off. The whole setup is water and UV proof so having it strapped in the rack in the back of your TJ with the top down shouldn’t hurt it.
Since Todd’s graphics are currently made for the typical scuba tank, they are a little tall when put onto a 10# CO2 tank. However, for those of you running a 15 or 20 pound tank, you may not need to trim anything.
My wife, Donna, loves to sew. Quilting is one of her favorite hobbies (even more popular than operating the video camera for me on the trail runs) and so I requested her talents when I started putting the graphics on the tank. While I could have found a scissors or box knife and cut the graphic to fit my 10# tank, Donna agreed to make the cut for me. She follows the old “measure twice, cut once” method while my results are more like “I cut it twice and it is still too short!”. Needless to say, she made very short work of the task and I had a 12″ tall graphic in no time at all.
The grahpic is designed to leave a gap on the cylinder. On scuba tanks, you can not cover the visual inspection sticker, so the graphic is sized to leave a gap where the sticker can be displayed. Since the gap was there, I positioned the graphic so that my CO2 sticker could be views (or at least most of it anyway).
With graphic on the tank, slip the protective sleeve over the tank. I had Donna cut this for me as well as it too was longer than desired. She trimmed it to 13.5″. The directions that came with the Scuba Hide mentions that the sleeve needs to extend past the graphic by about .5″ on both ends. I opted to make mine a little longer as it was my intention to have it snug around the tank’s tapered shoulder just a bit.
CO2 Tank System
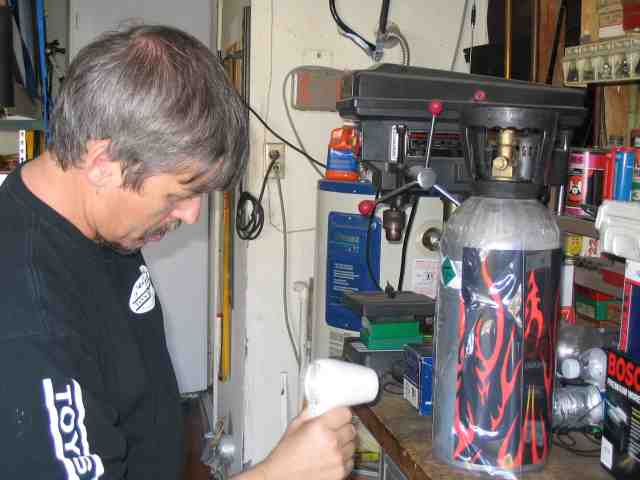
A quick trip to the bathroom resulted in one hair dryer, the remaining “tool” I needed to complete this project. I must admit that this is the first time I’ve done something in relation to my TJ where my wife’s sewing room and the bathroom yielded the necessary tools needed for the project.
Take it easy with the hair dryer. Keep it moving and don’t focus too much heat in one spot for too long. I found that working my way around the tank and shrinking the material a little at a time and then moving on seemed to work the best. Todd includes two sleeves with each graphic and the truth be known, my first attempt was not as good as I wanted it to be. So, I peeled it off with a razor knife and used the second sleeve. Attempt number two was much better.
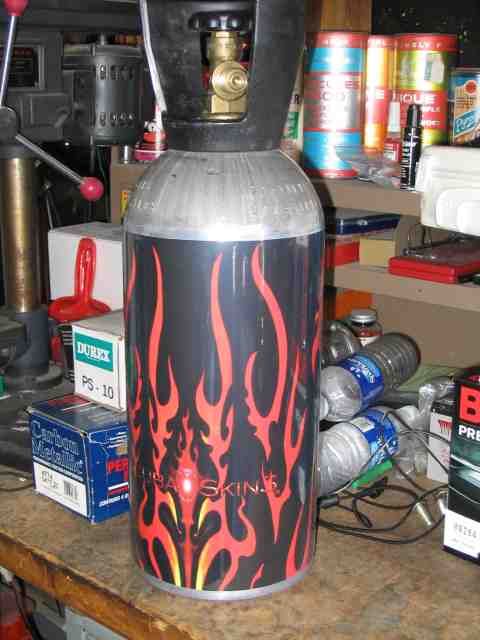
So there it is with the sleeve shrunk around the tank. On mine, the sleeve actually catches the edge of the tank, both at the upper and lower edge of the graphic. So it is on there very well to say the least. I don’t see it sliding around or coming loose.
You can view all of Todd’s handy work at www.scubahides.com. You can order one one-line for just $20 or call 800-375-4628 ext. 88. If your 4×4 club or business is interested in a custom design, Todd can make those too in quantities as small as 10 for just $25 each. Get in touch with him for details on the kind of graphic he needs from you, etc. I think it would look pretty sharp if a club had all of their tanks covered with their logo. What I’m personally hoping for is that Todd sees a good amount of interest from the 4×4 folks and starts making some regular offerings that are targeted towards our hobby.
So the next time you are at the air-up spot, I hope your CO2 tanks looks as good as mine. If it doesn’t, you got all the information you need to correct the problem. A big thanks to Todd too for answering all of my questions.
Remember to TREAD Lightly!