
If you have installed a suspension lift where you had to change out your control arms, you have done about 70% of an axle swap. Besides the control arms, you’ll need to remove the sway bar where it connects to the axle housing, the brake lines and housing vent fitting, and do something about your brakes. If you are doing an axle swap, such as changing out a D35c for a D44, the factory drum brakes can be moved over to the new axle, or you can upgrade to rear disc brakes as I did.. For details on removing the D35 drum brakes, please see the D-35c axle shaft removal write-up. Once you have removed the axle shafts, you may move removed the brake assembly from the axle.
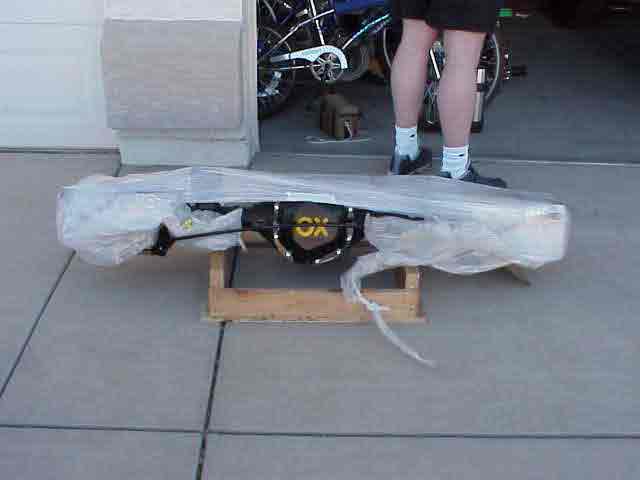
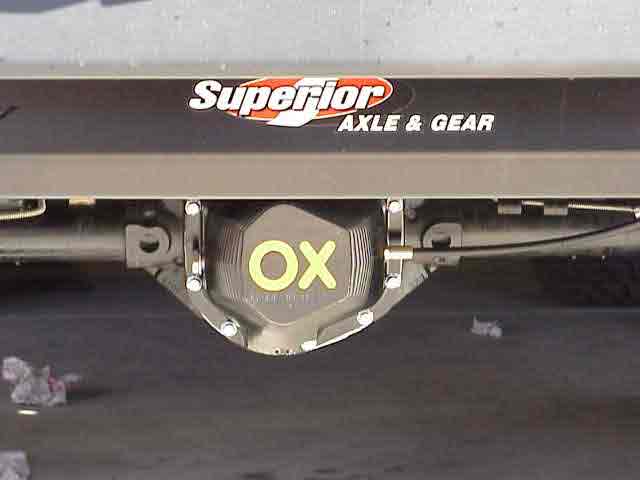
So, the owner of this nice shiny axle is none other than Les. It is a D44 with a Super 44 kit in it and an OX manual locker. He showed up at Chris’s house at the appointed hour and we unloaded the axle from his neighbors pickup truck. Oh yeah, did I mention that living in Arizona has its advantages? How many of you readers can do an axle swap on the 3rd of March while wearing shorts? LOL Those good looking legs belong to the axle owner!
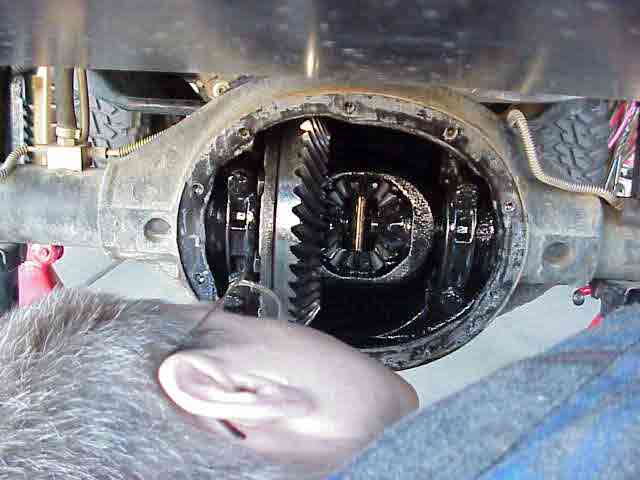
Those of us with D44 axles don’t know too much about those c-clip axle designs. Chris is getting up close and personal with the outgoing D35 diff while I read the factory manual to get a crash course on pulling D35 axle shafts. We figured it out and you can see the details here.
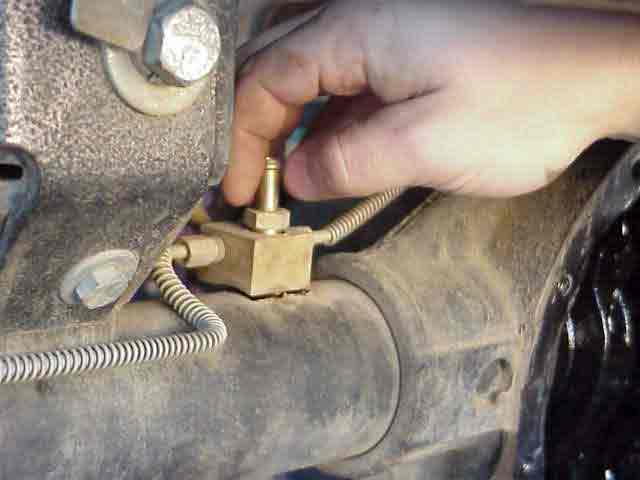
With the axle shafts pulled and the brake assemblies removed from the D35 housing flange, we salvage the diff breather and rigid brake lines. To remove the this block, first pull the breather hose off he top. A wrench will loosen the threaded breather tube which also holds the brake line t-junction in place.
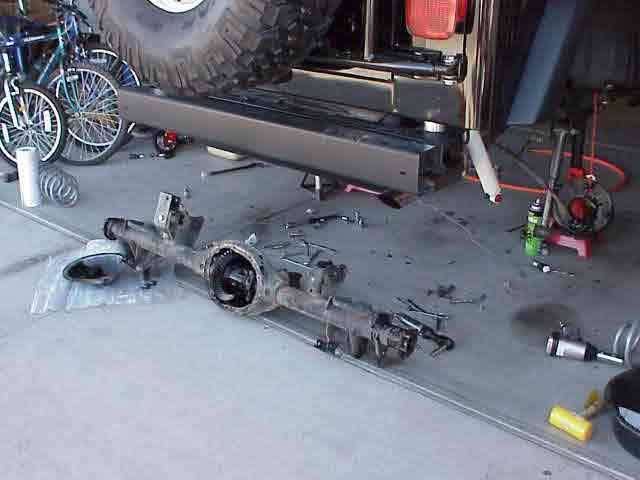
With the brakes and lines now disconnected, Chris jockeyed the floor jack under the diff housing. The sway bar, drive shaft, and control arms were then removed. While Les and I steadied the axle on the floor jack, Chris slid it out from under the TJ. Looking like it was road hard and put away wet, the D35 was out and ready to be replaced with the D44.
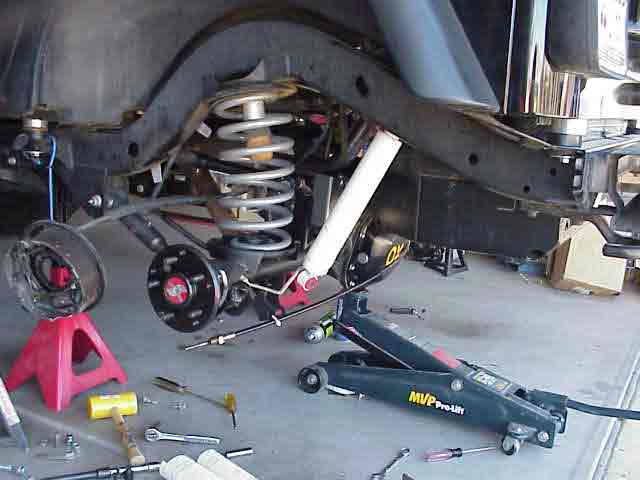
With the new D44 now balanced on the floor jack, the three of us position the new D44 under the TJ and start connecting the control arms. We pushed and shoved and finally got everything lined up correctly. Part way into getting the control arms on, Chris suggested we should put the springs back in. I thought it was an EXCELLENT idea! LOL At that point, Les and I headed off to the auto parts store to pick up a couple of items and find something that resembled lunch while Chris stayed behind and continued to replace parts on the axle.
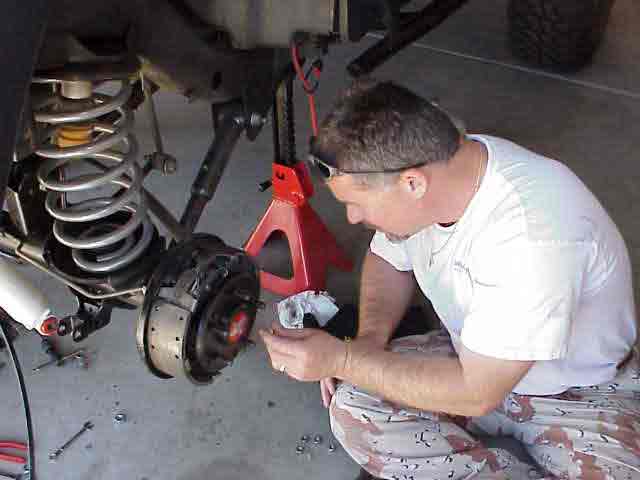
Joe showed up somewhere between our leaving and getting back so while we shoved some food into our faces, he continued where Chris stopped. Here Joe puts on the retaining nuts that holds the axle shaft retainer plate in place.
OK….we are almost done with the actual install of the axle (still got the cable and controller to do). Chris tells Les that since it is HIS Jeep, he gets to now crawl underneath and torque all of the control arms to spec, attach the drive shaft, etc. Les and I then gathered around and cheered Chris and Joe on as they bled the brakes.
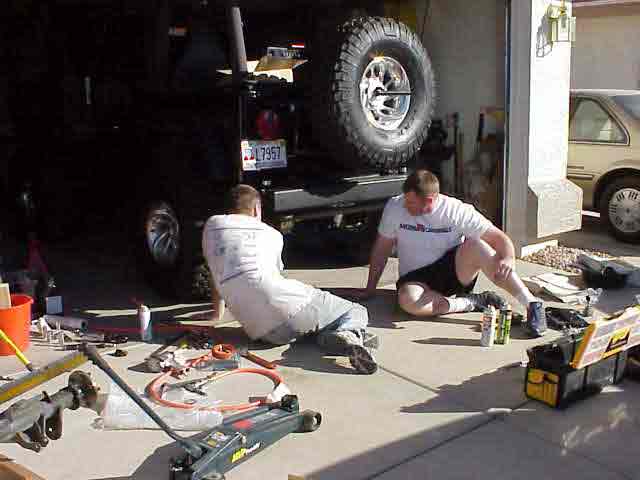
The finished product! All in place except for routing the control cable and installing the controller in the cab. We all had a pretty good time working on the axle. I had to leave before the controller was mounted. My best advice for doing this kind of a project is to do it with a couple of good friends! Many hands make light work, not to mention being able to balance the diff on the floor jack while aligning the control arms into their brackets.
March 9, 2001
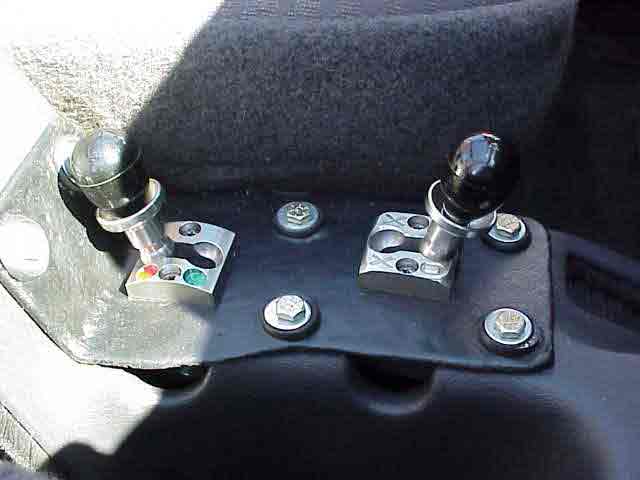
Les stopped by today for a minor wrenching session. I had been working on my oil pan skid and also my rear diff guard. We bled the brakes again, torqued the lug nuts, checked the rear diff fluid level, snugged up the rear OX drain plug. and I showed him how to change his speedo gear. I snapped the above picture today. He got his front OX installed earlier this week and this is his mounting configuration. He put them in the cup holder area of his console. The mounting plate is an aluminum plate that is coated with bed-liner. The setup looks pretty good to me.