
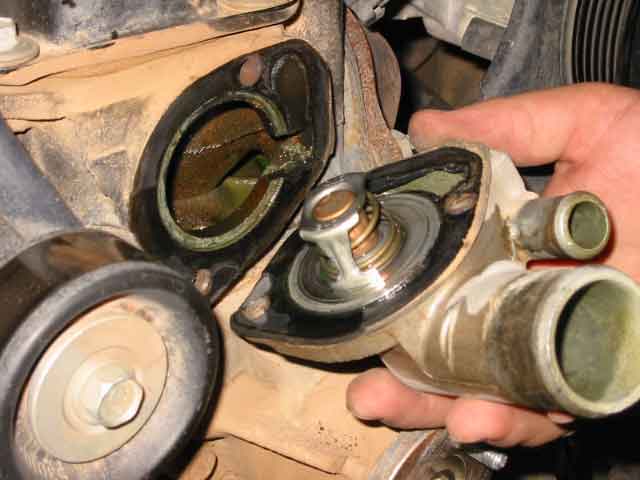
Scott had a high flow thermostat housing that we wanted to install at the same time. Just two bolts hold the thermostat housing onto the block. Be sure you pick up a fresh gasket at the auto parts store. You’ll more than likely need to scrape the gasket from the block as part of it will end up sticking there. While you are at it, you might as well pop in a new thermostat as well. Cheap enough and well worth the effort to do while you have it all apart. A stuck thermostat is such an annoyance, especially on the trail.
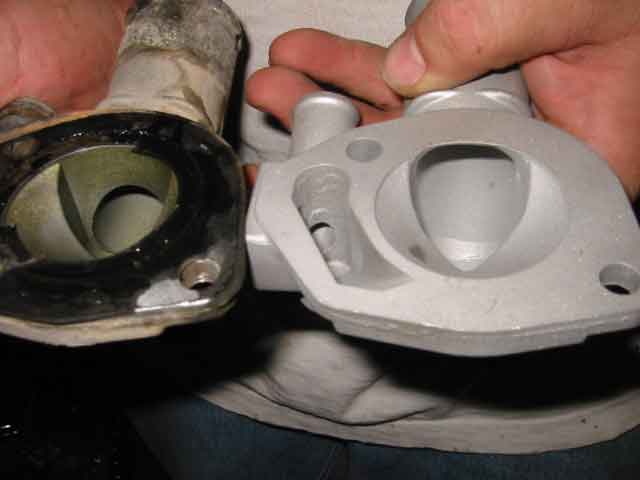
Here is a side by side shot of the old and new thermostat housings. The new housing is available from Turbo City. You can see how much larger the bore is on the new housing. It is more than twice as large as the factory thermostat housing. Coolant flow through here will not be nearly restricted as with the factory housing.

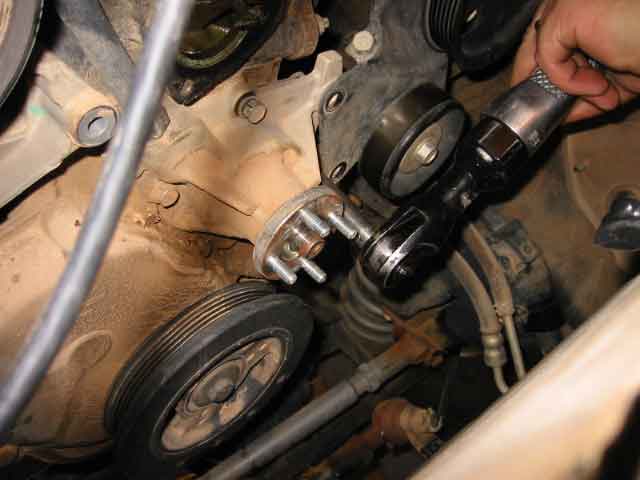
I removed this idler pulley also in order to have easy access to the water pump. As I write this, I don’t remember if I had to pull it or not, but I knew it was going to make cleaning up the gasket surface around the water pump a lot easier, so off it came. It is held in with a single bolt.
Remove the four bolts that attach the water pump to the block. Just a reminder….there are also two that attach the power steering pump bracket to the water pump/engine block and one underneath the power steering pump that attaches it directly to the block. Be sure to remove these as well. We also had to loosen the three bolts that held the power steering pump to the bracket (we did not remove them). Once these were loose, the water pump could be moved enough to slip it out from behind the power steering bracket.
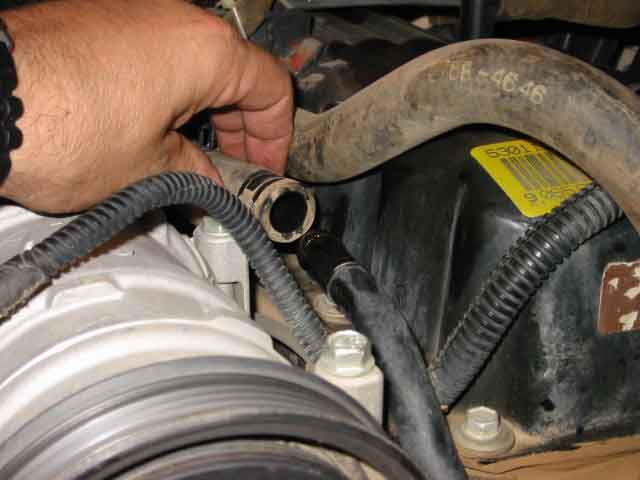
Remove the heater hose from the metal tube that connects to the top of the water pump. You will have to transfer the tube from the old water pump to the new water pump. Scott’s new water pump literature had a BIG caution in it about being careful to not over-tighten this tube as you screw it into the housing. I used some teflon tape on the threads and once all reassembled, it caused no problems. Just don’t get crazy and crank it down real hard.
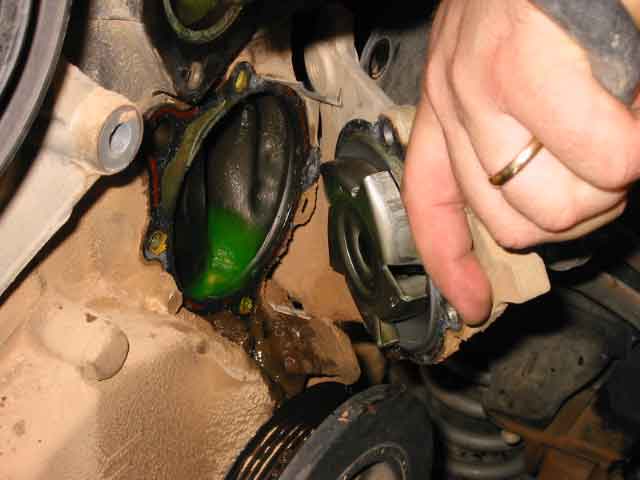
Carefully remove the water pump from the engine block. A bit of coolant will drain out at this point so keep a catch bucket handy to prevent a mess on the garage floor (and here you thought all the messy stuff was behind you!) Not to change the subject to much, but did you notice all the dirt on Scott’s engine block? I couldn’t believe it once we started pulling parts off of it. I gave him a pretty bad time about it and promised to drag his TJ down to the local do it yourself car wash and help him get rid of some of it. Honestly, when you are doing this kind of work, it really is nice not to have to deal with the mud that forms when the coolant mixes with the layer of dirt.
TJ Water Pump Replacement
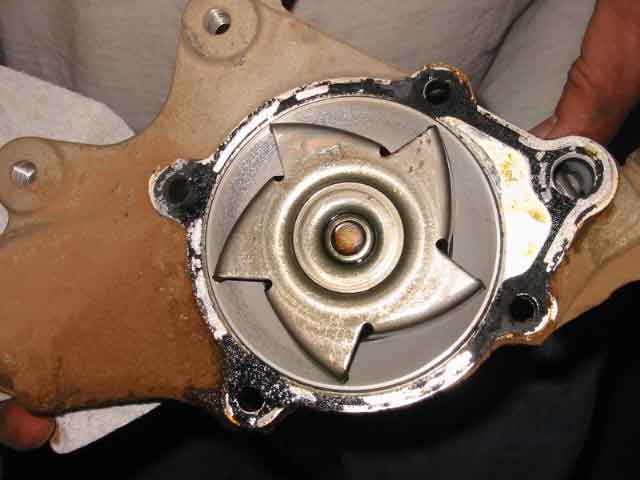
Here is the business end of the the removed water pump. If you look at the top fin, you will see the letter “R” stamped into it. This means it is a reverse rotation water pump. One would want to ensure that the replacement is the same. Having the fins configured in the opposite direction would cause poor (no?) cooling in your vehicles engine.

I have just unscrewed the heater hose tube from the old pump. As you can see, there is some kind of red thread sealant on it. As I said before, I used teflon tape on this, after cleaning it carefully with a wire brush. Scott’s new pump did NOT come with the studs for mounting the fan assembly. We had to remove the studs from the old pump and transfer them to the new pump. As neither of us had a stud puller, we used the good old double nut trick to remove them. Screw a nut onto the stud and then put another one on right after it. Using two wrenches, tighten the two nuts so they jam into each other. Now, use one wrench and remove the stud as though it were a regular bolt, from the pump. You can install them using the same technique.
Next came the cleanup of the old gasket material on the engine block. Take your time and do a good job. Since this was Scott’s project, I let him scrape the old gasket junk off. He put a couple of paper towels into the engine block opening to help prevent the debris from getting inside the water jacket. This stuff would certainly plug the core tubes in the radiator and you don’t want that to happen.
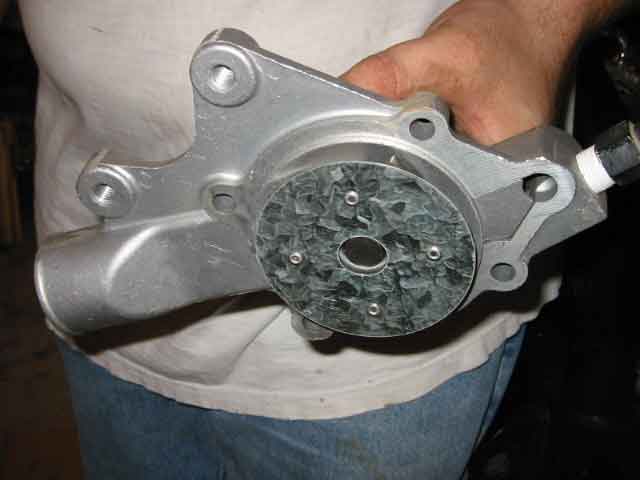
Here is the new water pump. Note the manufacturer has pop riveted a piece of sheet metal to the vanes on the pump, making them more efficient. Be sure to follow any specific directions that come with the pump. There were some included with this one that dealt with the gaskets.
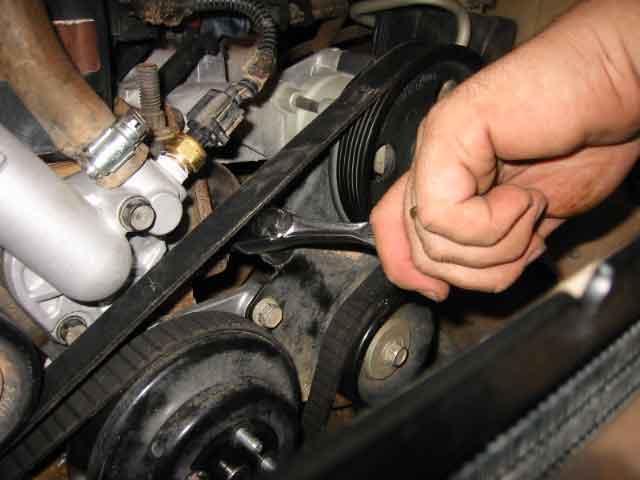
With everything cleaned and ready to go, you basically reverse the disassembly order. Here is Scott tightening the belt tensioner before the fan assembly was put back on. It is much easier to adjust it now then after the radiator, shroud, and fan are also back in place.
As always, be sure to consult the service manual for the properly torque specs on the various bolts you wrenched on. Some of them don’t take very much umph! The last thing you want to do is snap one off in the block! DOH!
After all is back together, take some distilled water and mix it with your favorite brand of coolant at the appropriate percentage (your choice on what is right for your climate). After running the vehicle for about 5 minutes (with the radiator cap in place), I carefully opened the temp sensor. Scott said I should see some air bubbles when I did and sure enough, it burped a couple of times. He said this helps get the air out of the water jacket and prevents hot spots in the engine.