
Being a ham radio operator for the past 40+ years, the combining of my radio hobby and off-roading hobby just makes sense. The TJ offers me the ability to get up on some very tall mountain tops here in Arizona, which can make for a fun ham radio afternoon. It also allows me to talk with someone back at the house (both my wife and a son are hams too) when I am out on the trail. This is more important to me than chatting on the radio to other hams. If you are interested in any of the different trail communication methods available, check out this article that covers a wide range of radios that are available for this purpose.
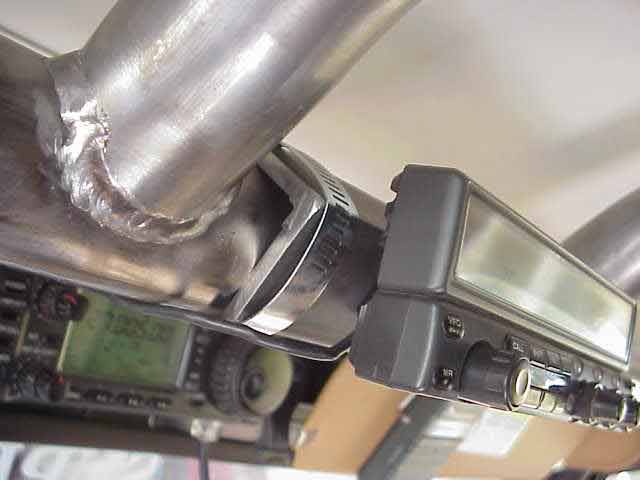
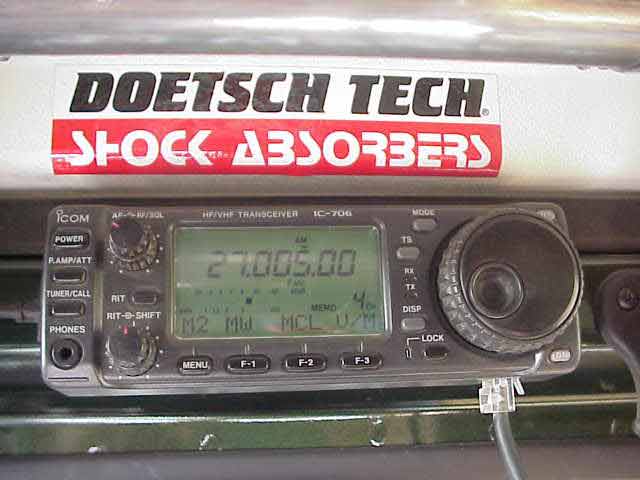
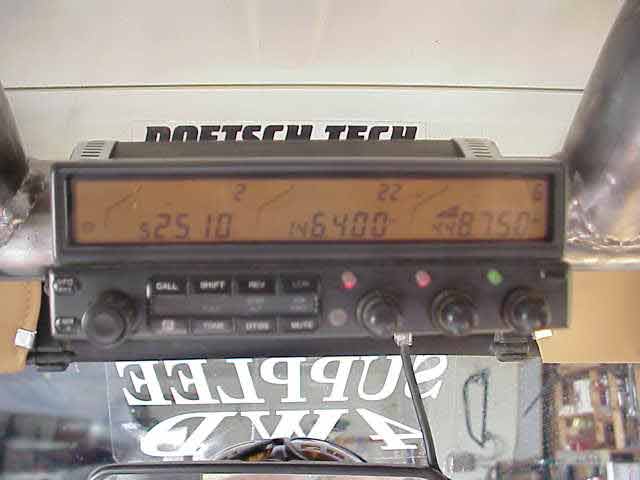
Here is my Kenwood tri-band FM radio front panel, and behind it is my Icom 706 front panel. Several years ago, the ham radio manufacturers started making radios with detachable front panels, much like the CD players are today (but for other reasons). With the interiors of vehicles getting smaller and more “curvy”, it is becoming more and more difficult to mount the entire radio in or around the front dash area. These radios, with the detachable front panels, allows me to mount the bulk of the radio under the seat or in the rear of the radio. All of the radio controls are on the front panel (and many are duplicated on the microphone) which enables me to have the radio chassis out of sight and out of mind (and more importantly, out of the way!).
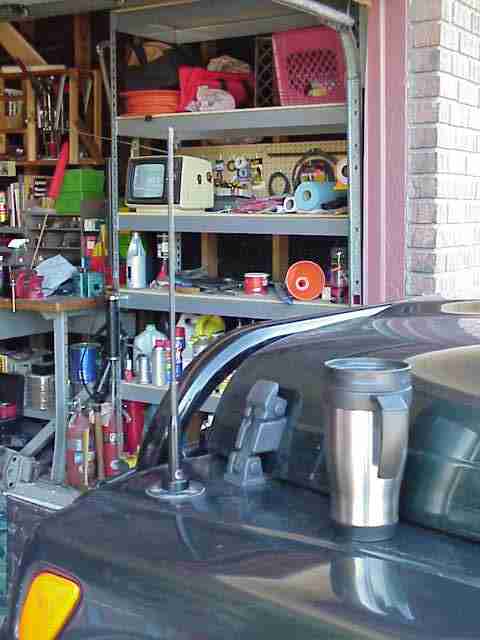
Note the mounting bracket that I made for the Kenwood’s spot on the roll bar. The guys that built my front roll bar gave me a piece of 1.25″ angle iron from their scrap pile. Wayne was nice enough to cut it off at the 6″ mark with his power hack saw machine and therefore saved me some labor. After marking the appropriate spots for the radio’s factory front panel bracket, I drilled and tapped the thick angle iron for some 8×32 screws. The little front bracket was securely attached to the angle iron using the 8×32 screws and lock washers. Next, I took the liberty of trimming the excess screw stock from the back of the angle iron with a Dremel cutoff wheel. This allowed the angle iron to fit flush against the roll bar. The angle iron was then clamped onto the roll bar using a pair of 2″ hose clamps. The result is a very sturdy and inexpensive radio mount that can be adjusted for any viewing angle. You could use this same method on a full sized CB radio and clamp it on top of the roll bar if you wished.
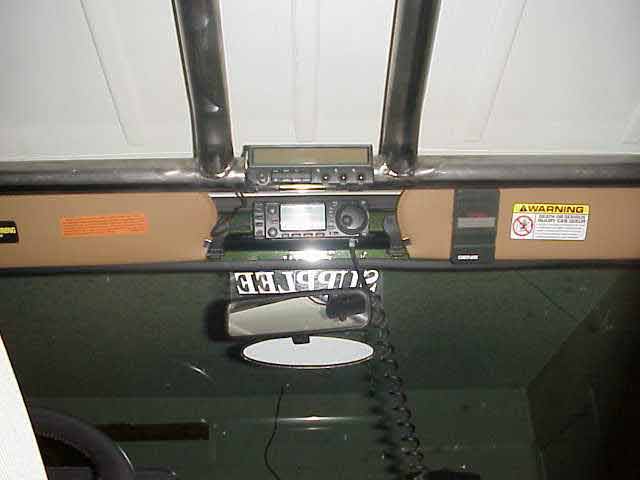
As you can see, both radios provide good accessibility to either the driver or the passenger. The Icom’s microphone is attached to the dash using some Velcro while the Kenwood’s mic connects from under the seat (where the radio is bolted down) and the mic hangs from a mount on the dash.
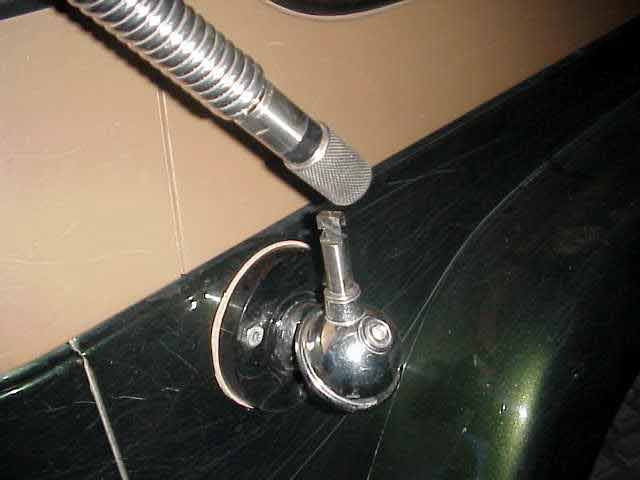
The mount above is a typical ball mount that was common back in the ’70s CB craze. This mount is a good quality mount that I purchased at the local ham radio store. I mounted it over a welded seam in the body panel for added structural strength. Here is a view of the ball mount as seen from inside the TJ (and the SGC-230 antenna coupler). You can see the upper two bolts in the picture. The remaining 3rd bolt is accessible from the fender well area, as it lies below the weld where the fender and quarter panel are welded together. This spot makes for a very strong mounting location for this kind of antenna mount.
I opted to install the Hustler Quick Disconnect 3/8″x24 antenna adapter (and you thought the front suspension was the only thing that had a quick disconnect on it) on the ball mount to make it easier to remove and store the antenna. I had been using a 102″ steel whip that was tethered from the front of the Jeep to help prevent it from causing such a problem when driving off-road. In the heavy brush that we sometimes encounter in and around the washes, it would sometimes break loose and necessitate having to stop and tie it back down again. Don’t get me wrong….I like the 102″ antenna since it gives me something useful for running my ham radio with when doing mobile operation, like around town or on the highway. In the brushy areas, it is a pain in the butt! So, I put a quick release adapter on to make it easy to change antennas. The mount has an internal spring loaded locking mechanism. You press down, give it a quarter twist, and then release it. It locks up nice and tight until you want to take it off by reversing the procedure. Hustler warrantees the adapter for 2 years, so I think it will last for a while.
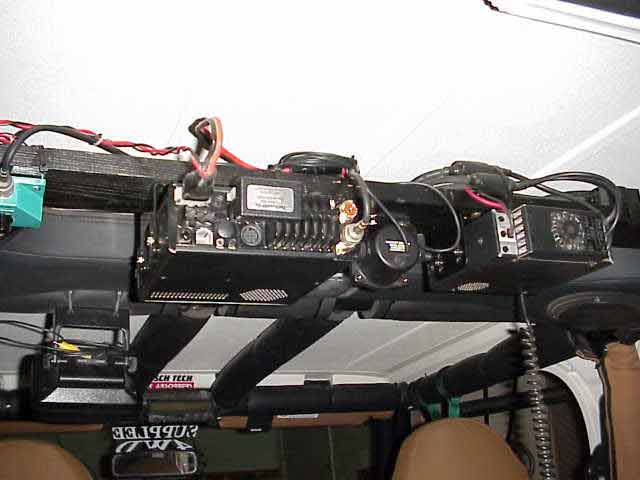
Update July 6, 2001 – For those of you wondering where I keep the radios, they are tucked up out of the way just behind the sound bar on their own mounting “board”. I took a 1″x4″ pine board, rattle can painted it black, and cut it for a tight fit on top of the roll bar pads (it kind of wedges in between the top of the bar and the hard top). I just finished relocating them to this position today. Prior to this, the Kenwood was under the driver’s seat and the Icom was behind the driver’s seat. Although out of the way, they were also subject to water damage should I ever find myself in that situation….the floor boards being the first thing to flood in a deep water crossing. So I decided to “move them to high ground” and this is where they ended up. I have to dress up a few more cables, but I think you get can get a pretty good idea. I didn’t lose much in the way of space since I never stack anything that high in the TJ.
Update May 20, 2002 – The VHF/UHF antenna mount for my Kenwood tri-bander is starting to crack the fender’s sheet metal. After almost 3 years of use (that constitutes trying to trim all of the brush and Palo Verde trees along the trails with the antenna), the metal stated to fatigue. I decided to give it one more shot before calling it quits.
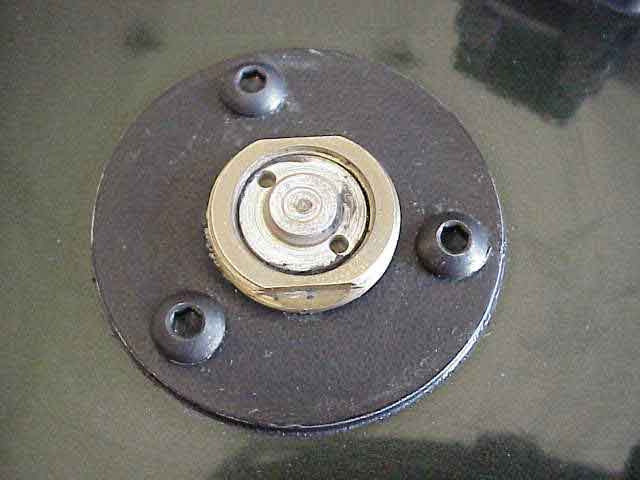
Using a hole saw that I borrowed from a friend, I cut a new mounting plate from some 1/8″ thick plate I had laying around. I figured if I could distribute the base load over a larger area, it would do a better fighting off those cactus limbs on the trail. I used some Allen head 1/4×20 5/8″ screws to bolt the mounting plate to the same area I had the NMO mount previously installed.
Here is what it looks like with the flexy dual band antenna installed. This is the one that I started using in the brush when the 3′ long Diamond tri-bander started taking its toll on the fender sheet metal.
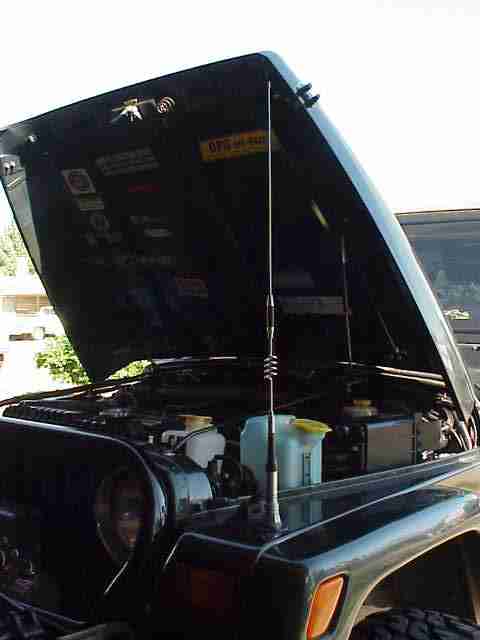
Here is the 3′ Diamond tri-bander mounted on the fender mount. Unless I am running ridge trails where there is minimal brush, I keep this stored in the TJ and mount it for highway trips or in a emergency on the trail when the short antenna just doesn’t have quite enough antenna gain.
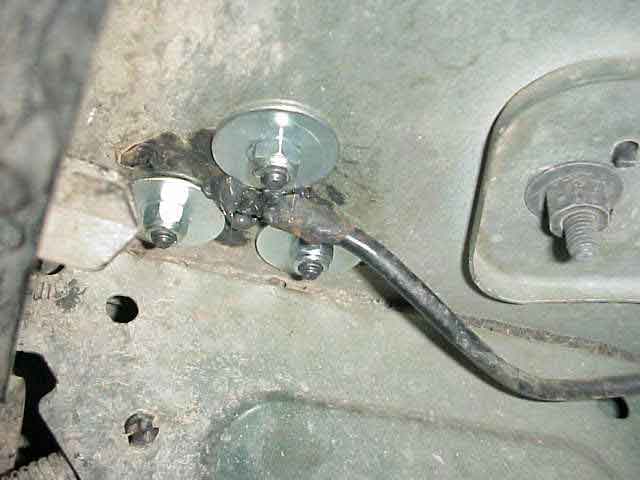
Here is the bottom side of the fender. I used 1 1/4″ fender washers to again help spread the load over a larger surface area. I still need to pack in some of that coax silly putty (I don’t remember what they call it) to seal the bottom of the mount properly, but that is easy enough to do. With the drought we’ve been having here in Arizona, it’s not like I’m actually going to get it wet.
Icom 760 HF/VHF All Mode Radio
Kenwood TM-742 Tri-band FM Radio
TJ Radio Installation
Update 3/26/2006 – Since I started storing my half door windows in the rear section of the TJ, I’ve kind of grown fond of that space at the top of the roll bar. So…..I opted to move the radios to beneath the front seats.
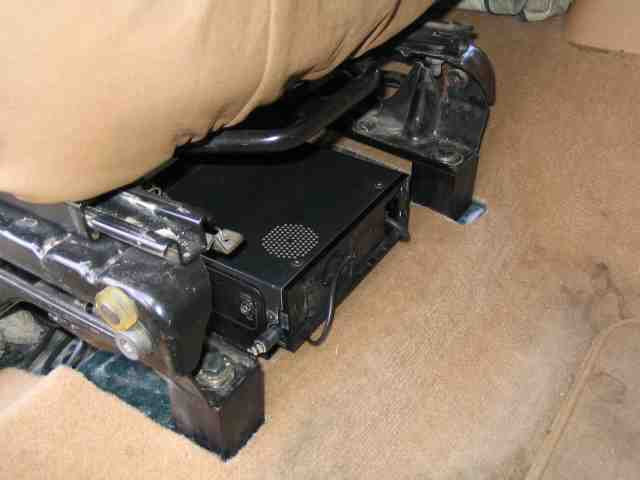
Here is a pic of the passenger seat with the Kenwood TM-742 mounted beneath it. Since installing the seat risers, there is plenty of room to mount the radios and getting them in and out is a lot easier. If you haven’t checked out the TJ seat risers, you need to take a few minutes and do so now.