
With my Toys by Troy corner guards installed, it was time to think about putting some flush mount tail lights on the back end of the TJ. Dirk Sanders, of DPG Off-Road, hooked me up with some new 4″ LED tail lights, made by American Superlite, Inc. Model SL4000 is a red stop, turn, and tail light assembly. The unit has 15 LEDs, an operating range of 12 ~ 38 volts, and meets FMVSS 108 requirements (a DOT standard that specifies requirements for original and replacement lamps, reflective devices, and associated equipment). I opted to mount the lights using the Model 40400 black grommet.
Before I get into the install details, I have to tell you about a phone conversation I had with an employee from American Superlite. I sent them e-mail last week after reviewing their on-line catalog (hoping to find the mounting hole specs for the rubber grommet mount). Failing to receive an answer to my e-mail, I called the company. To make a long story short, the employee I spoke with didn’t have a clue as to the hole size I needed. I find it funny that they publish the dimensions of the LED assembly itself, but no guidance for installing it. Oh well, I used the trial and error method on a piece of cardboard and got a working pattern to try on the TJ.
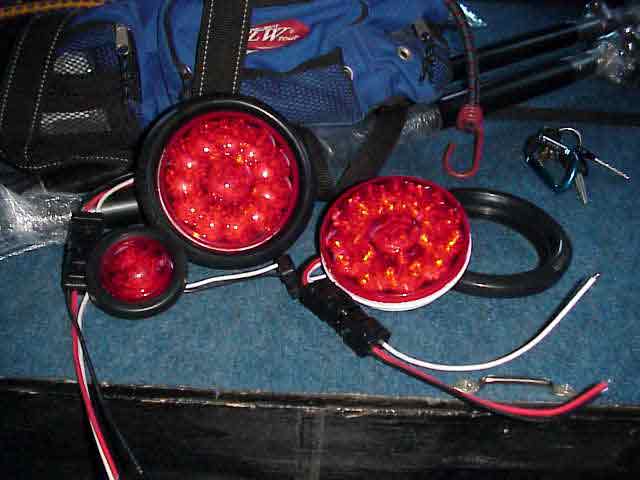
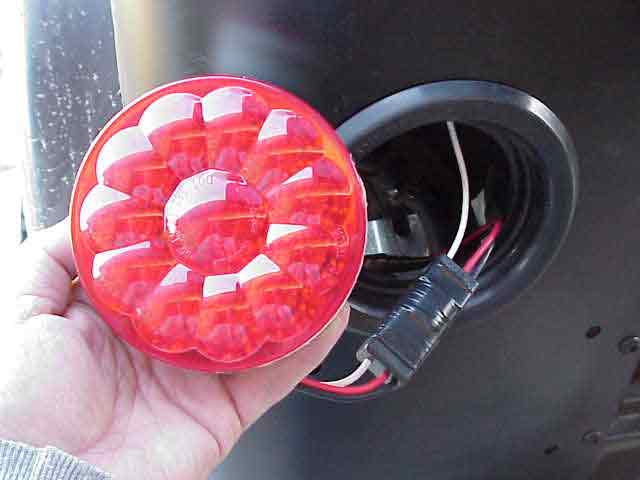
Here is a picture of the lights and grommets. The small 2″ light was obtained for use as a side marker. At first, I decided not to install it as it did not quite give me the flush mounting style I wanted on the side of the corner guard. However, I eventually did install them. The 4″ light on the right is shown with the mounting grommet next to it. The other light has the grommet on the light assembly.
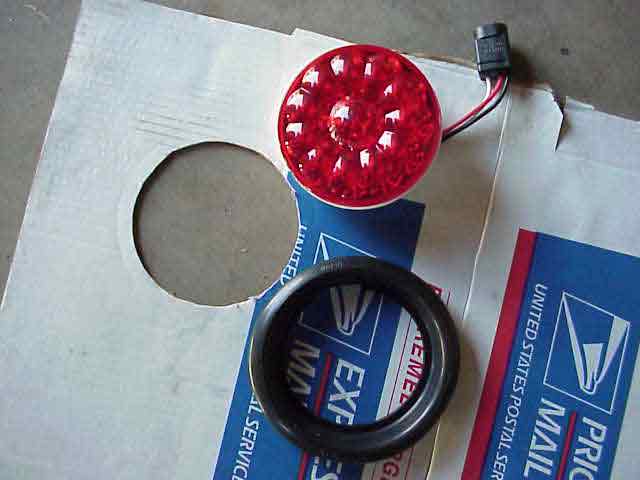
A few measurements were made and a circle was drawn on some cardboard. It looked as though a 4.5″ hole was going to work. The grommet seemed to fit this hole nicely and the LED light fit tightly in the grommet. I trimmed the cardboard down to a manageable size to make a template.
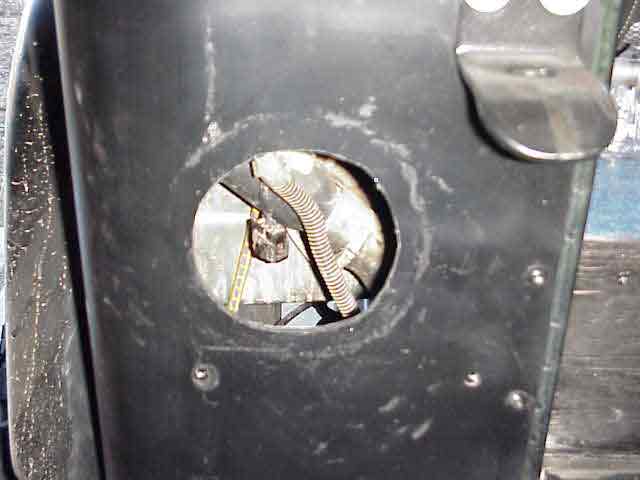
If you have an ’03 or newer TJ, you should know that an evap canister (part of the pollution control equipment) is located in the passenger rear corner of the body. It is located behind the tail light and will make for a tight fit depending on what kind of light assembly you decide to install. Tim, a Jeeper who used some of the info from this site while doing his LED conversion, sent me a link to his install where he re-located the evap canister. Tim thought it might help out some other folks should they decide to do it and I agree. Don’t ask me anything about it as I don’t have one on my ’98 TJ.
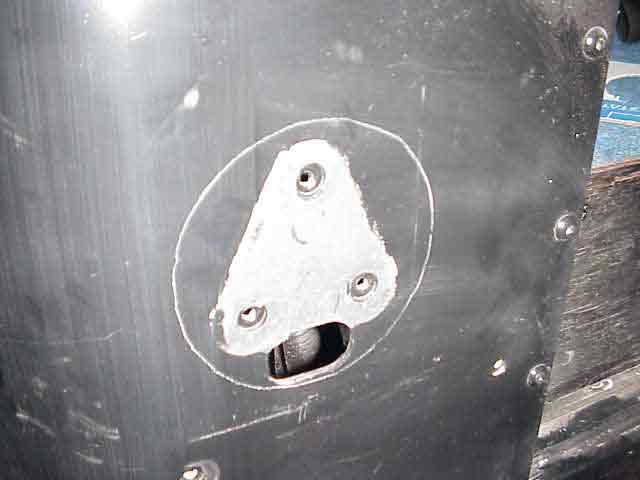
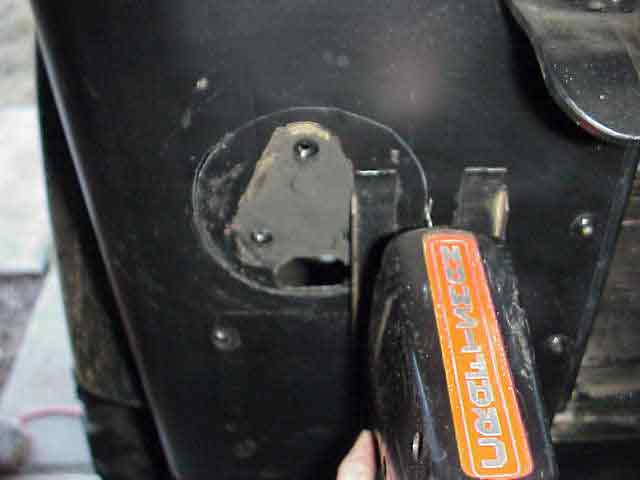
Update 02/18/2012: I noticed that the above link from Tim no longer has the photos available for it. <sigh> So it is when you rely on someone else’s site. However, I was fortunate to have just received some information from JacobH who recently did a LED conversion on his ’05 Rubicon. He came up with a different method by which to accommodate the close fit in regards to the evap canister. He sent his comments and some great photos and gave me permission to add them to the site. So here is JacobH’s solution for making things fit with the evap canister.
I removed the stock tail light assembly. With a white marking pencil, I traced the circle onto the corner guard. (note: I have a set of 1st production run TBT guards which did not have the holes for the LEDs cut in them. The guards are now available with the LED cutouts.) I centered the template over the factory mounting area. If I had to do it all over again, I would locate the hole about a 1/4″ further towards the tail gate edge of the corner guard. There is adequate room and by moving it slightly to the right (for this light), the rubber grommet would not be sitting right at the edge of the corner guard bend radius. It still seals OK, but I would have preferred it be over just a bit more to the right.
Armed with a fresh supply of metal cutting blades, I fired up my trusty old jig saw and got down to the job or removing a 4.5″ piece of corner guard and the tub behind it. Make sure you are CLEAR OF ALL WIRING prior to cutting. I would really stink to slice your wiring harness in half as you make the hole. I took a bungee cord and hooked it around the cable to make sure it would not get in the way.
A blade or two later, I had the hole cut that was pretty much round (did I mention I have a problem staying within the lines?) Hey, the wiring survived too! I was on a roll now, for sure.
Note: If you your TJ is an ’03 model or newer, be aware that your Evap Canister is located in the void here behind your stock tail light on the passenger side. Most folks have found that the normal LED assembly will not quite fit flush due to clearance problems with the canister. Here is a write-up on moving the canister a small amount to provide adequate clearance.
More LED Lights
Since I didn’t feel like walking inside to get the FSM (so I could wade through the wiring diagrams to identify the wires I needed), I hooked up a voltmeter and did it the old fashion way (turn on the headlight switch and see if the meter reads 12 volts). At this point, I needed to figure out if I was going to keep the factory connectors in place or remove them during the project. The LED lights already came with a connector and pigtail so I decided that having two connectors for each light was a bit of overkill (not to mention yet another place to get some corrosion and reduce the reliability of the lights). Besides, by not using the connectors, I was able to leave the factory connector on the factory tail light assembly. This means I can sell it for a couple of bucks to one of the local folks when they smack their new TJ into a rock and break the factory light.
The next table shows the wire colors I found on my ’98 TJ. Where two colors are shown, the second color is the tracer (the thin striped line) color. Note that the LED lights do not support a backup light function. Likewise, there is no ground wire in the Jeep harness where it connects to the stock tail light assembly. With all of the various bolts and screws in this area, there was no problem using one of them as a ground for the LED lights. The side markers use a two wire harness with a black and white wire.
| Jeep Harness | Light Function | LED Harness |
| Purple/Black | Backup light | – |
| Black/Yellow | Tail light or Side marker light | Black |
| Green/Red | Left Stop & Turn Signal | Red |
| Brown/Red | Right Stop & Turn Signal | Red |
| – | Ground | White |
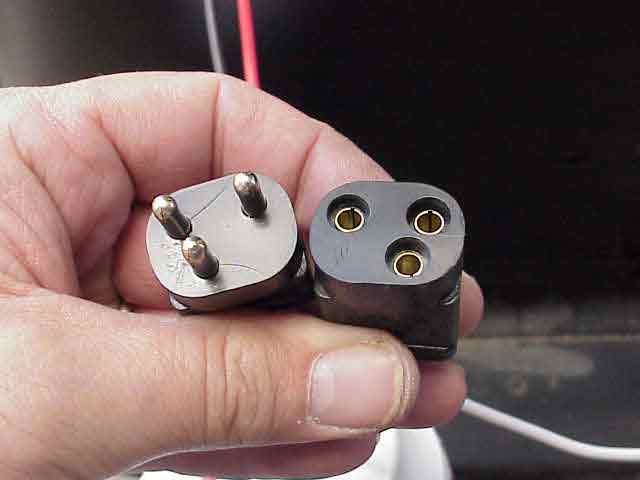
Here is the business end of the LED light connectors. Well made, in my opinion, and not likely to have the wires pulled out of the end of the plugs (like the factory plugs are known to do).
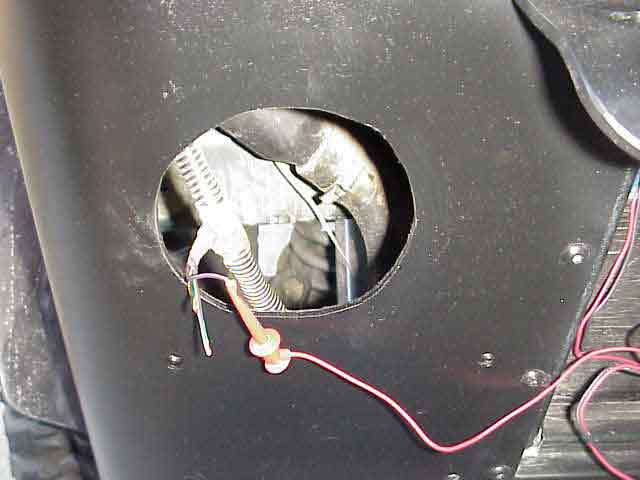
I connected the tail light and stop/turn light wires using crimped butt splices. I then wrapped those two pairs of wires with rubber tape (vulcanizing) and put a double layer of regular vinyl electrical tape over the top of it all to protect it. I’ve been using this style of waterproofing on antenna hard line connectors for years and have never had one get moisture inside of it. I crimped a ring terminal onto the end of the ground wire and attached it to a nearby bolt.
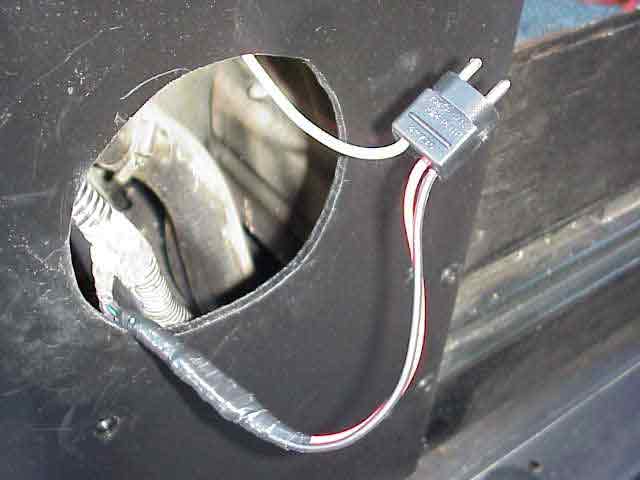
With the mounting grommet put in place, I plugged the LED light into the wiring harness and then taped the connector together in the same fashion as I did the butt splice connectors. (no reason to waterproof one connector and leave another one untouched)
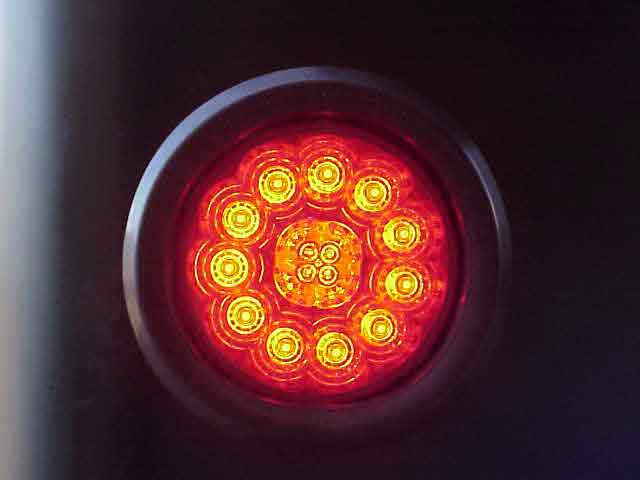
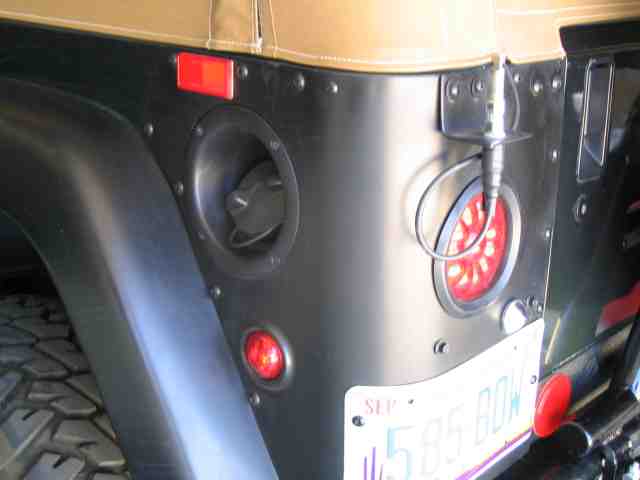
So, here is the finished product. Don’t ask me why the camera shows the LEDs as yellow….something to do with the CCD pickup (I assume). In reality, they are red….as red as you can imagine. Plenty easy to see in broad daylight, no problems there.
The same procedure was used to install the passenger side LED light. The only difference was that I hooked up the right turn signal wire on that side (DUH!). Again, be careful when you cut the hole….make sure there is no wiring behind it where your metal cutting blade can get at it.
Update: 3/8/2008
One of the concerns that some TJ owners have expressed over the years is the lack of passive light reflection that most (all?) LED tail lights lack. I’m sure most of you have noticed that the factory TJ tail lights have a portion of the red lens designed such that it will reflect the headlights of an approaching vehicle when the TJ is parked along the side. This is a feature (for both vehicles) that provides a measure of safety when the parked vehicle does not have its lights turned on.
Some TJ owners have installed red reflective tape on the rear bumper to provide reflectivity once a rear LED conversion was performed. There is now another option available for the round 4″ LED. A reflective mounting flange is now available from Gold Coast Distributing Co. Check it out!
Update: 05/31/2004
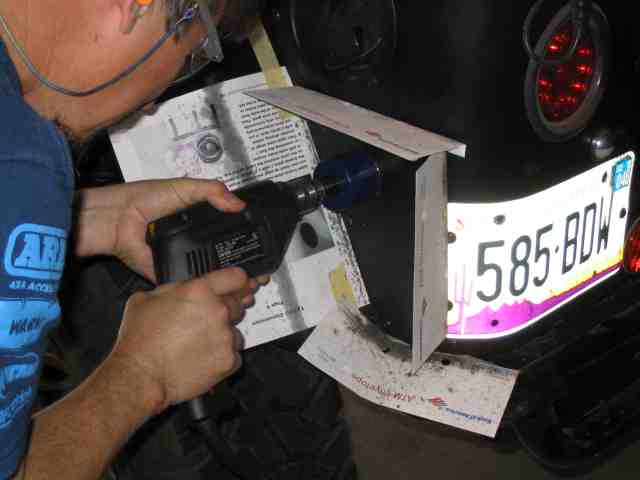
So I’ve been helping my buddy with his LED install and today, he was going to finish up the red side lights. I changed my mind in regards to the side LEDs I had and opted to install them at the same time we worked on Mike’s setup. Hey, if we have all the stuff out, why not use it. The above paper and tape is to keep the oil from slinging all over the place (Mike’s idea). We dipped the hole saw into a small cup of oil quite often while cutting the holes. After all was said and done, the hole saw appeared to be just as sharp as when we started the hole-a-thon.
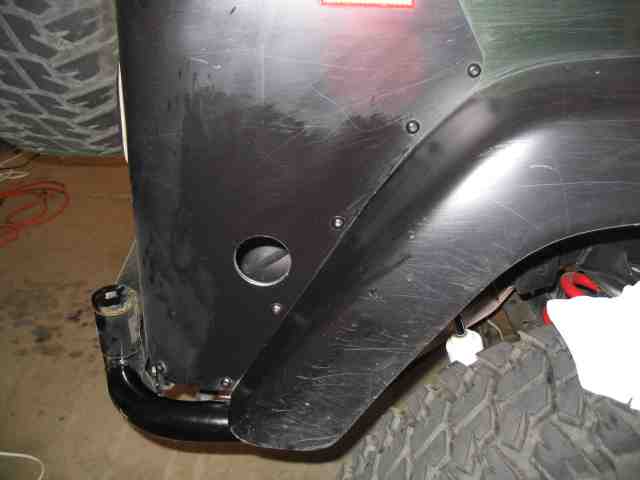
A quick wipe down with a paper towel and an inspection with the rubber grommet was done to make sure we had the proper clearance. I’ve found that the grommets need to have a little slop when properly seated in the hole. Just another reminder….don’t forget to check behind the drilling spot to make sure you don’t have any cables, wires, or hoses that may get cut by the hole saw.
OK, so I forgot to take a picture on the other side but I remembered to do one on this side. The reflective marker at the top of this photo does in fact reflect quite well. The side marker is quiet bright and will do a fine job at night. I spliced the marker lights into the harness work I did for the tail lights. Just follow the wire colors in the table above.
Update: 12/12/2009
I exchanged e-mail today with a site visitor that owns a metal fabrication company. They do all sorts of cusomt metal work which includes using hole saws. He wanted to pass along a good technique used by the techs in his company. Here is what Chuck had to say:
Hi Stu,
I was reading your installation of LED lights and saw you using cutting oil on the hole saw, which as you know makes a mess. An alternative that we use in our business ( stainless steel fabrication) is to pack the cavity in the hole saw with crushed ice. The melting ice cools the saw, flushes the chips from the cut, and allows you to cut continuously, and clean up is much easier. Just an observation.
I wanted to pass this info along in case you didn’t feel like cleaning up the oily mess. I’ve not tried it myself but given that Chuck does this for a living, it obviously works. He would not use such a technique if it caused damage to the product being cut or the hole saw being used.