
Welcome to the JeepSpecs.com in-depth page on WJ Generation Jeep Grand Cherokee RB1 navigation radio installation guide. We have organized as much information as we could find into a helpful article below. Is something incorrect or missing? Please get in touch with us and we’ll fix it!
Jeep Grand Cherokee WJ
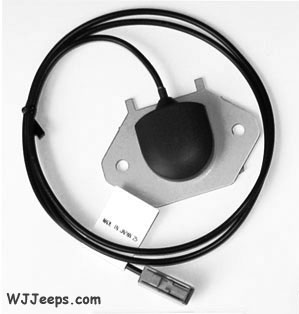
The RB1 Navigation Radio is designed to install directly into any 2002-2004 model Jeep Grand Cherokee, utilizing the existing factory wiring harnesses. It can also be installed into earlier models using a special radio harness adaptor cable. All steering wheel controls for the radio are retained, and while in the NAV mode these buttons will operate selected navigation functions. The RB1 will also operate the factory 10-disc CD changer if so equipped. The small flat antenna for the NAV system also needs to be mounted, under the dash behind the instrument cluster. It comes attached to a metal bracket and mounts with a peel ‘n stick adhesive strip.
Installation of the RB1 radio is easy and can be done in 30 minutes or less. The only tools required are a 7/16″ wrench or socket (negative battery cable removal), a trim removal tool (radio bezel) and a phillips head screwdriver (radio and cluster).
Package contents:
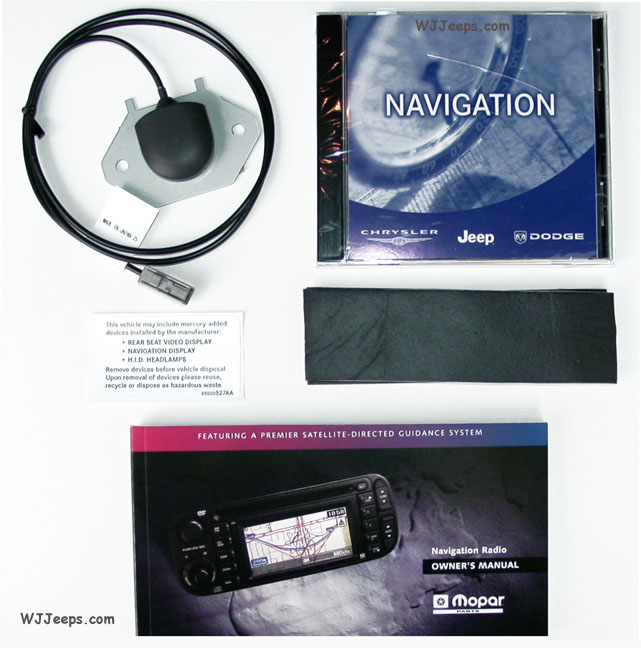
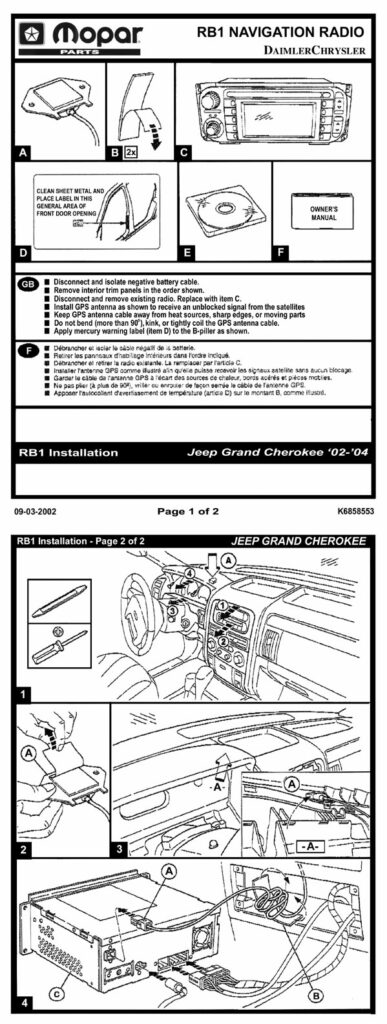
The RB1 package includes the special navigation antenna, a DVD-Rom disc, foam pads to secure cables, a mercury disposal warning label, detailed owners manual and installation sheets showing antenna mounting locations and basic installation diagrams for all applicable Chrysler vehicles.
When the RB1 was originally introduced, a mail-in certificate for one free update navigation disc was originally included inside the DVD jewel case. The offer, a “$150 value”, was discontinued starting in September of 2003 and has not been offered again.
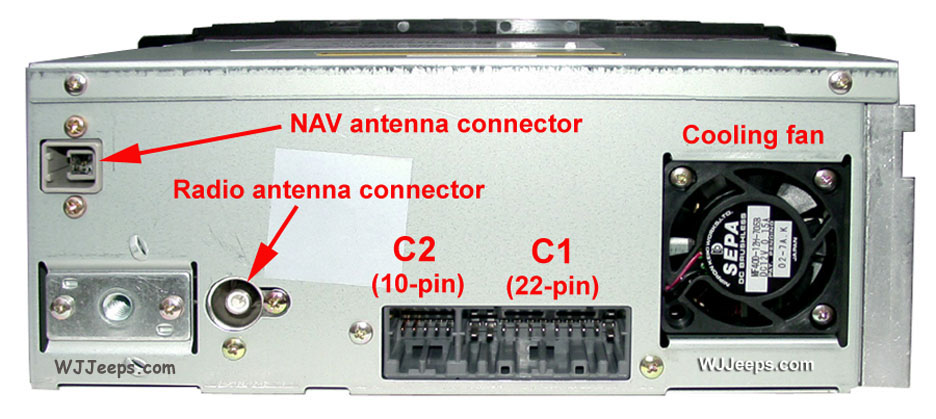
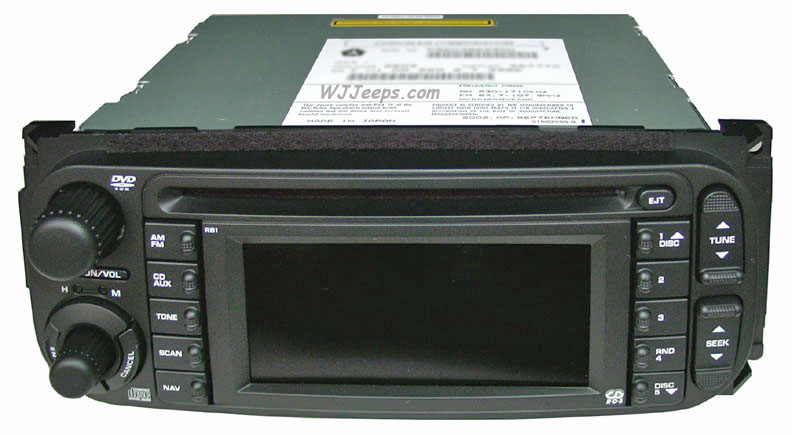
Rear view of radio showing connectors, and navigation antenna
Installation:
1. Disconnect and isolate the negative battery cable.
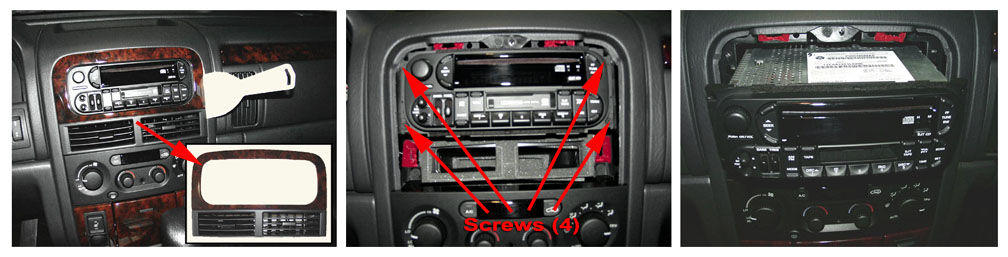
2. Remove radio trim cover bezel, as shown in the photo sequence above. The radio and vent trim bezel is one piece and is held in place with 4 spring clips. With a wide flat tool or trim stick (a 3″ plastic spackle tool works great), gently pry on the lower left and lower right sides (along the air vents) and carefully pull the bezel out a little at a time until the bottom is free. Pry at the upper left and right sides to free the top clips. The four red areas seen in the center picture are the felt-lined receptacles that the bezel spring clips snugly fit into. This shows the general area of where to pry when removing the bezel.
3. Uninstall factory radio by unscrewing the four Phillips screws from the corners. Pull out radio and remove the two rear wiring harnesses and the antenna. Warning: The new style radio antenna connector is “locked” to the radio. DO NOT force or pry it out. To remove, slide the outside collar back and pull straight out.

4. Remove steering wheel top bezel trim. The trim piece is attached with four spring clips, one at each corner, and pulls straight out. On the left side, you can reach your thumb behind the bezel rubber at the tilt wheel lever cut-out and pull forward. If so equipped, you’ll need to unhook the Adjustable Pedals switch harness from the back of the bezel.
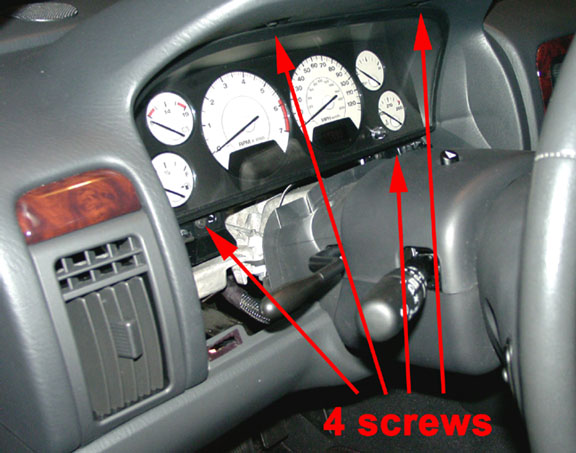
5. Remove cluster assembly. The cluster is held in place with four Phillips screws, two along the top and two on the bottom. At the two upper screw holes there are recessed tabs that must be slightly pried down to release the cluster, which you can then pull outward and away. You can also push down on the lower screw hole tabs to wiggle the cluster free. There is plenty of slack allowed to unhook the single 12-pin connector. Be careful not to scrape the bottom of the cluster housing along the top of the steering column trim, and handle the cluster unit with care. If the needles happen to float over to the “wrong” side, simple turn the unit on end to float them back to “0”.
WARNING: On vehicles equipped with the premium instrument cluster, the cluster circuitry provides an alternating current to supply power to the electroluminescent illumination lamp through a pigtail wire and connector that is accessible at the back of the cluster housing. Use proper precautions when handling this unit during diagnosis or service to avoid electrical shock and possible personal injury.
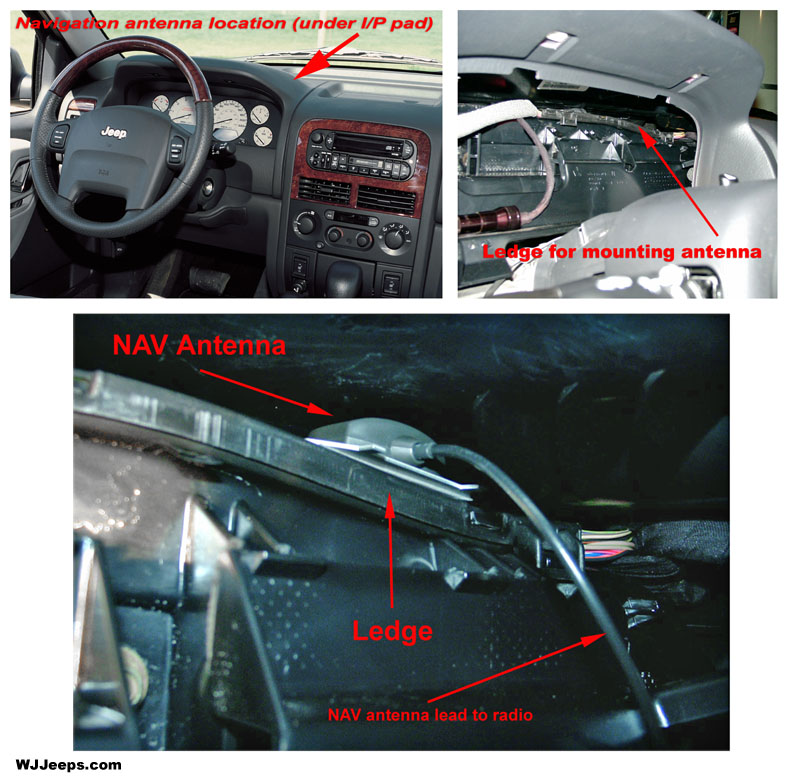
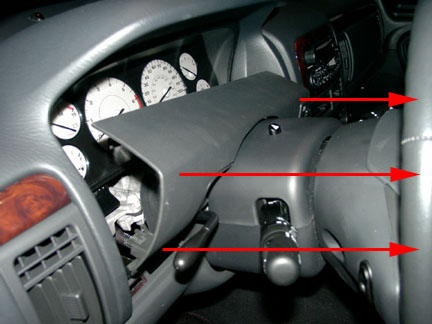
Location of NAV antenna behind the instrument cluster
6. Install the Navigation antenna by peeling off the paper backing and attaching it behind the cluster, as shown in the photos above. You’ll see the small ledge formed by the black plastic (air duct). The antenna mounts “facing up” and sits on top of this ledge. If the ledge area is dusty clean it first with a damp cloth and wipe dry. Press the antenna to the ledge and hold down tightly for a few seconds to secure it. Route its wire over to the area in back of the radio. Do not bend (more than 90 degrees), kink, or tightly coil the antenna cable. Store excess cable behind the radio using one of the supplied sticky-backed foam pads. It can be attached to one of the existing cables to hold it in place. Keep antenna cable away from heat sources, sharp edges, or moving parts.
7. Install the RB1 radio by plugging in the two radio harness connectors, NAV antenna, and radio antenna. Carefully push the radio into its slot and make sure no wires are being pinched. Install the four radio screws and reinstall radio trim cover bezel.
8. Re-install gauge cluster and upper steering wheel bezel trim.
9. Reconnect negative battery terminal.
10. Calibration. Turn on the radio and insert the DVD navigation disc. To allow the unit to synchronize with the GPS satellites, park the vehicle outside in an open area. The GPS antenna has the best reception away from tall buildings or trees. This process will take the system about 10-30 minutes to receive the GPS data and find the approximate vehicle location. (Note: This procedure is only required the first time you use the product or if the vehicle has been towed a long distance.)
11. Read the RB1 owner’s manual, front to back.
Back to Navigation Radio main page