
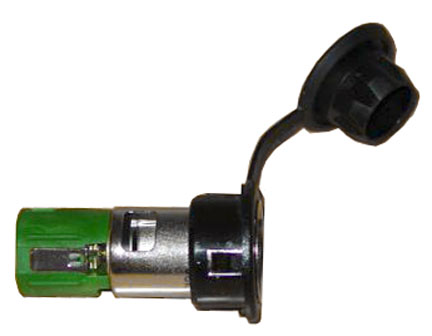
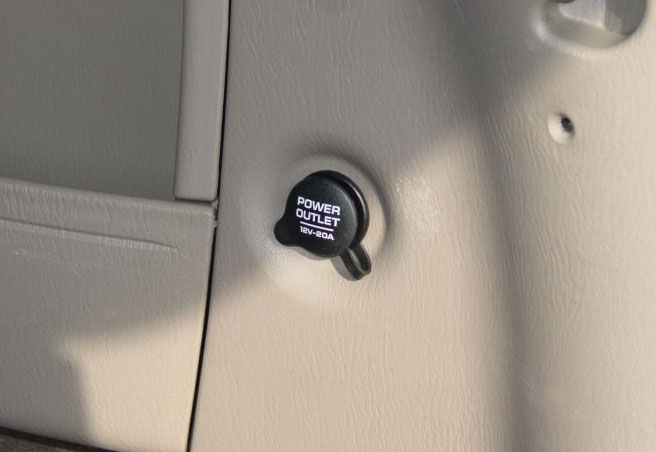
The power outlet base or receptacle shell is connected to ground, and an insulated contact in the bottom of the shell is connected to battery current. The power outlet receives battery voltage at all times from a fuse in the Power Distribution Center through a fuse in the Junction Block.
The power outlet base and mount are secured by a snap-fit within the trim panel. A plastic protective cap snaps into the power outlet base when the power outlet is not being used, and hangs from the power outlet base mount by a strap while the power outlet is in use. While the outlet is very similar to a cigarette lighter base unit, it does not include the two small spring clip retainers inside the bottom of the receptacle shell that are used to secure the heating element to the insulated contact.
The power outlet base or receptacle shell is connected to ground, and an insulated contact in the bottom of the shell is connected to battery current. The power outlet receives battery voltage at all times from a fuse in the Power Distribution Center through a fuse in the Junction Block.
Outlet use with engine Off – Cautions:
Many accessories that can be plugged in draw power from the vehicle’s battery, even when not in use (i.e., cellular phones, etc.). Eventually, if plugged in long enough, the vehicle’s battery will discharge sufficiently to degrade battery life and/or prevent engine starting.
Accessories that draw higher power (i.e., coolers, vacuum cleaners, lights, etc.) will degrade the battery even more quickly. Only use these intermittently and with greater caution.
After the use of high power draw accessories, or long periods of the vehicle not being started (with accessories still plugged in), the vehicle must be driven a sufficient length of time to allow the generator to recharge the vehicle’s battery.
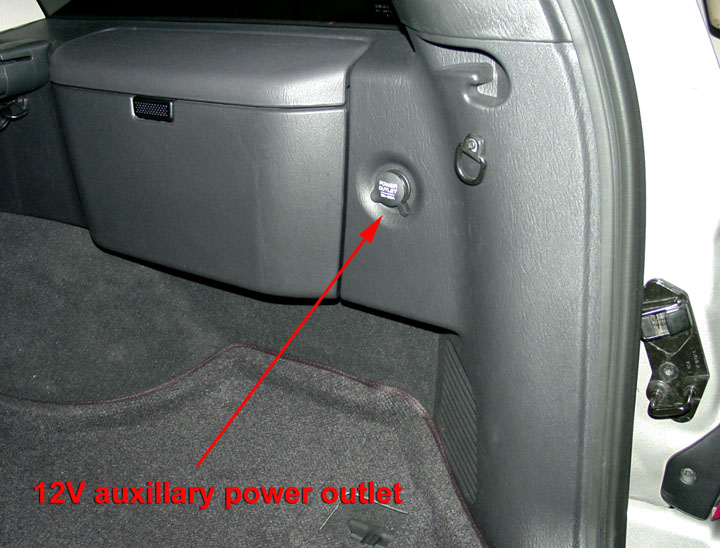
Adding the power outlet to models not equipped with this option
Most WJ’s that came from the factory without the power outlet have the wiring harness intact, tucked away behind the carpet in the rear quarter panel. The outlet receptacle and cap can be ordered from Jeep and easily installed.
Instructions for removing the quarter trim panel to install the outlet
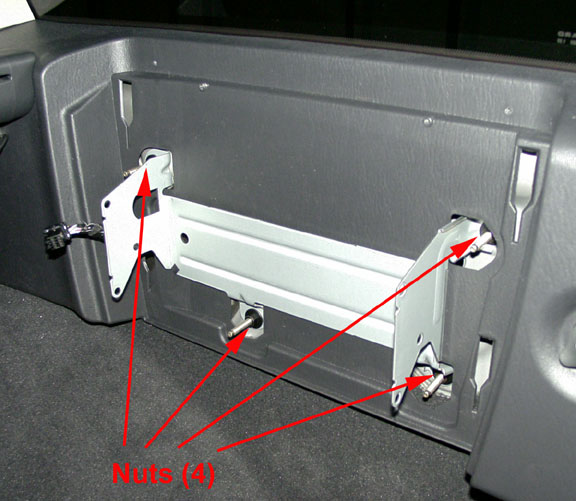

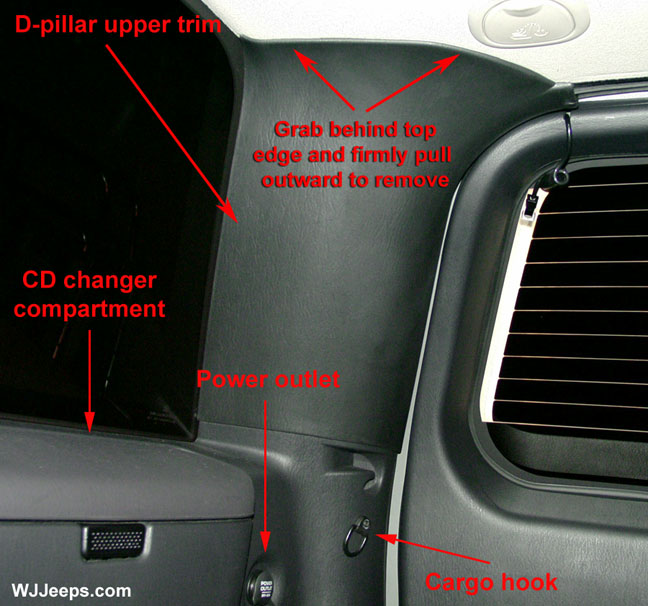
1. If equipped, remove the CD changer housing and CD changer. Open the changer lid and remove the four phillips head screws that run along the top edge of the compartment hinge. Lift compartment housing straight up an inch or so until it stops and then pull straight out to remove. Disconnect the wire harness connector on the left side of the changer unit. Remove the four metal bracket nuts with a 10mm deep socket. The changer unit with its bracket attached can now be removed.
Note: it is possible to access the area where the 12v receptacle is located without removing the metal changer bracket, but the area to work in will be limited since the quarter trim can only be pulled back a short distance. The CD changer unit though must still be removed via its six side screws.
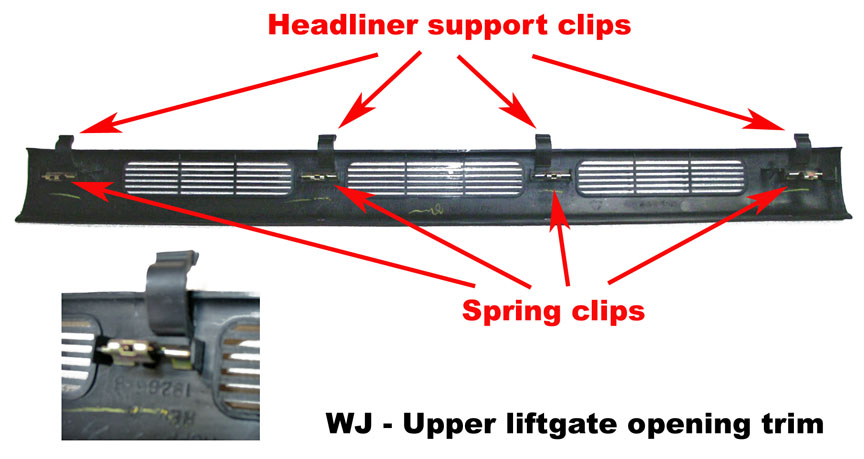
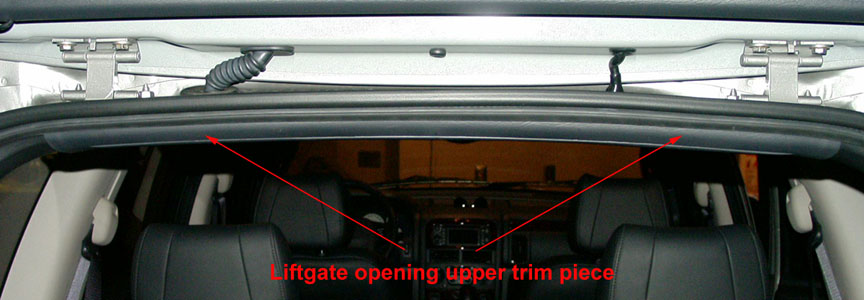
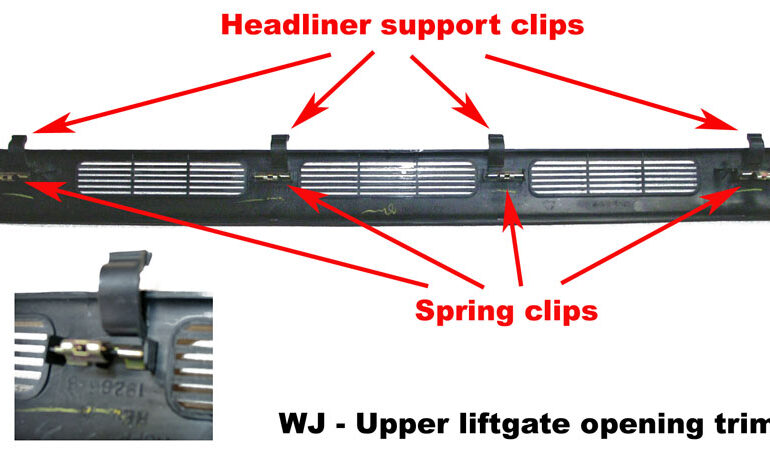
Liftgate opening upper trim piece
2. Remove the liftgate opening upper trim panel piece. The trim piece is held in place with four spring clips. Grab the edge closest to the front of the vehicle and carefully pull it down enough to release the spring clips, working from one side to the other. Tilt it down from the front and pull it back to disengage the four headliner support tabs. When reinstalling note the plastic alignment tabs and make sure they and the spring clips are properly aligned before pressing them back into place.

| D-pillar lower trim screw | D-pillar upper trim |
|---|
3. Remove the phillips screw on the right side of the lower liftgate opening trim piece. This will allow the quarter panel trim to be pulled out from under the trim piece.
4. Remove the D-pillar upper trim piece by grasping it at the top and pulling outward. It is held in place by two strong spring clips and two alignment pins.
5. Remove the two metal cargo net hooks that are attached with phillips screws.
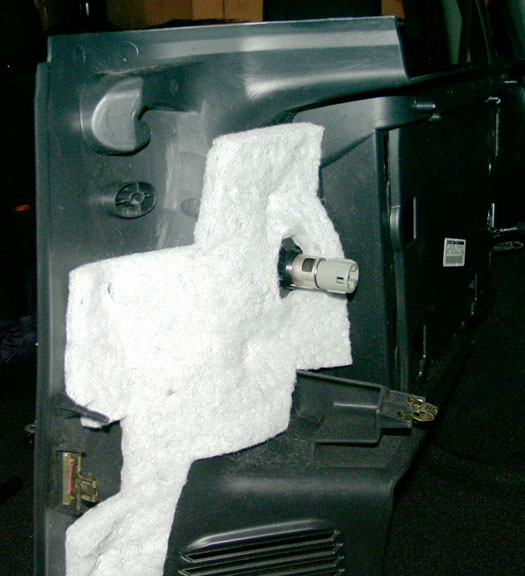
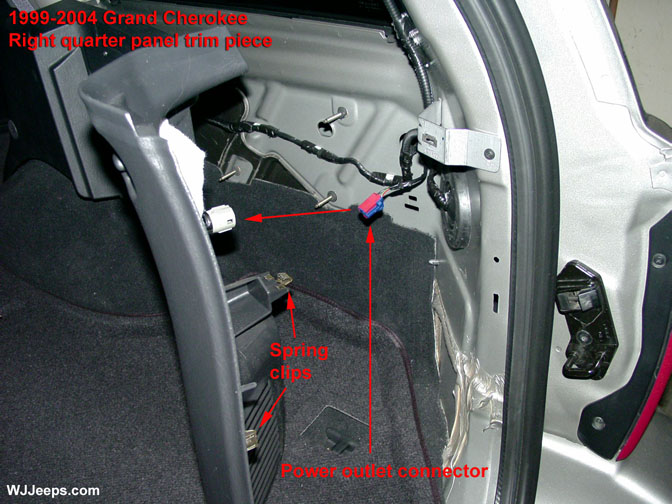
| Power receptacle harness | Rear view of power outlet |
|---|
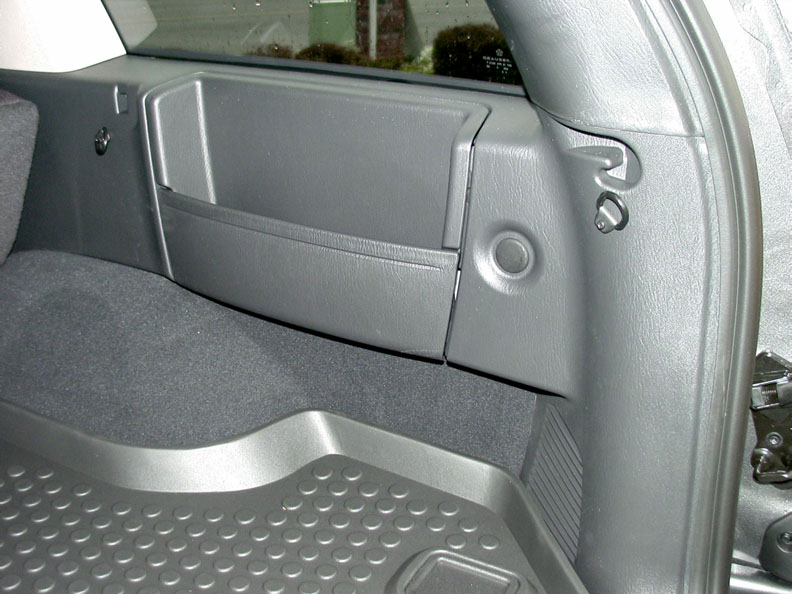
6. The quarter trim piece can now be slid out far enough to access the work area for the power receptacle. In fact, at this point if desired the trim piece can be totalled removed by folding the seat down and releasing the snap clips on the front end. Look for the blue and red harness connector that is stored in the corner, possibly hidden under the carpet. This connector may not be present on all WJ vehicles in which case new wiring will have to be run (see info below). If the harness is found, attach the power receptacle socket into the trim panel and attach the wiring connector. The trim panels can now be reinstalled.
Note: Make sure that all of the plastic guide pins and metal spring clips are aligned properly to their slots before pressing the trim pieces back in to place.
7. Confirm that the door opening rubber molding is positioned over the quarter panel trim piece along the entire edge, and also along the top edge of the cargo door opening.
Adding an outlet to vehicles that do not have the factory wiring harness
(Information for the best way to run your own wiring to the back for the outlet will be provided here in the future.)
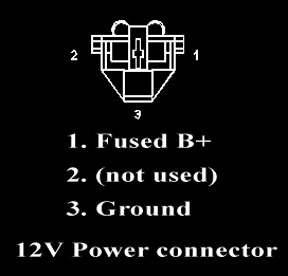
Pin wiring for the 12v outlet connector
OEM parts
| Power outlet OEM parts | ||
| Item | Part number | MSRP |
| Power Outlet | 4793554 | $11.20 |
| Cap | 4685591 | $3.85 |
Special thanks to JasonC for contributing information for this page