
Welcome to the JeepSpecs.com in-depth page on the WK Generation Jeep Grand Cherokee dash mounted radar detector. Did we miss anything? Please get in touch with us and tell us about it!
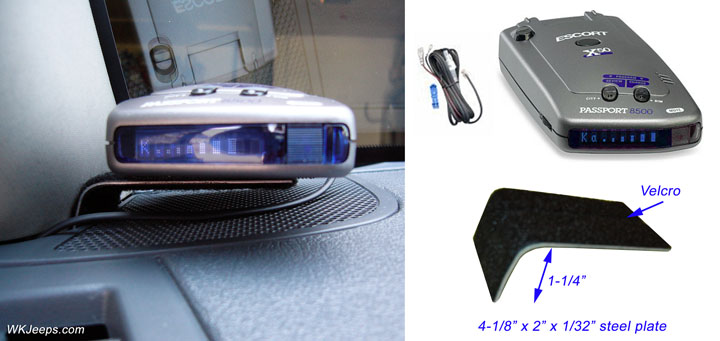
I have never liked the idea of having a radar detector mounted in the middle of the windshield with those suction cups, it sticks out like a sore thumb and is too far away to conveniently change settings. And there really is no room around the rear view mirror. In my WJ I simply mounted it in the left corner of the dash, sitting it right on top of the instrument panel and held on with velcro. But in the WK the speaker covers the whole area there so I was faced with the “challenge” of trying to come up with some sort of bracket to hold it above the speaker. After about an hour of digging around the garage in my scrap bin for something that would work I came up with a flat piece of 1/32″ steel…
I put the steel piece in the vice and made a slight bend on one side. The steel bends easy so I was able to make some slight adjustments along the way.
I then covered the entire piece, top and bottom, with two strips of velcro. The piece fits perfectly in the gap between the dash and the A-pillar molding and is easily adjustable forward or back. I put two strips of velcro on the bottom of the radar detector and mounted it in place.
This is a very simple installation and allows easy removal of the detector. You hardly even see the bracket and it doesn’t really interfere with the speaker audio. I thought of also putting a tiny screw through the bracket into the A-pillar molding but it really isn’t necessary as the detector stays in place just fine, even when performing a hard launch.
Dash panel and bezel removal
In the WK it is easy to gain access to the wiring behind the dash under the steering wheel. Underneath the steering wheel is a large access panel door that opens and rotates downward. Grab the panel in the top center area and pull firmly to open. If desired the panel door can be pulled out and removed. Below the panel door is a black plastic hush panel which also may be removed if desired. It is held in place with two phillips head screws.
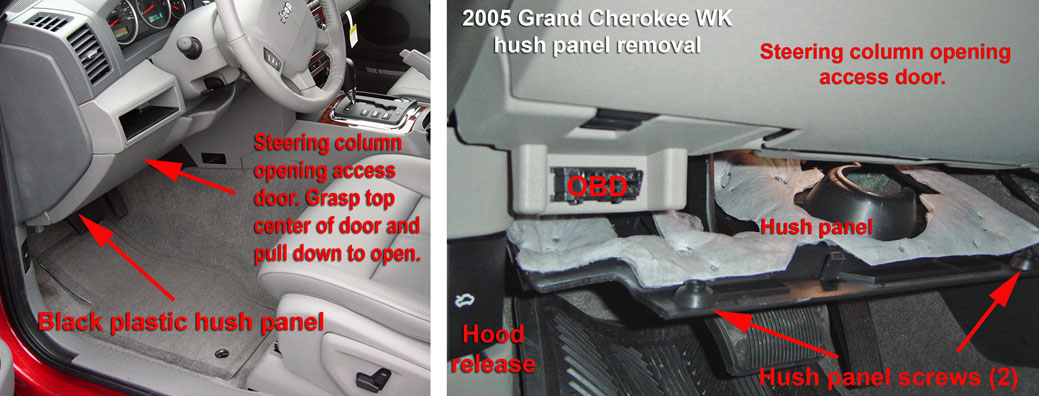
Underdash hush panel and steering wheel cover removal
Lower center bezel removal (requires removal of upper radio bezel):
1. Remove the radio bezel. Using your fingers, pull the center bezel free from the dashboard by grasping the curved back edge on top of the instrument panel and pulling/jerking it forward a little. The bezel is fastened with spring clips, carefully pull the bezel outwards around its perimeter to release it.
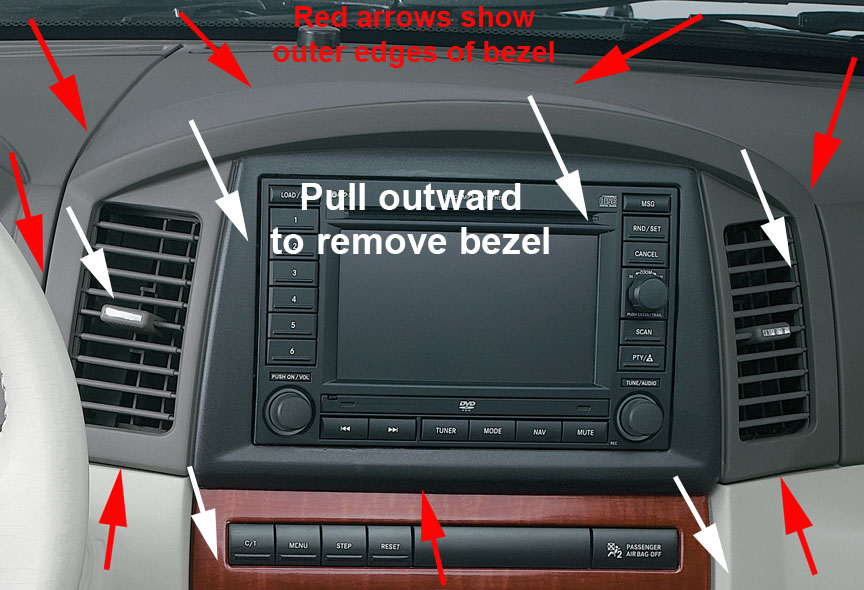
Radio bezel removal
2. Remove the trim around the shifter, it is also held in place by spring clips. A wide stiff plastic putty knife works best, pry up around the sides to get it started, then pry off the thin inside chrome piece which is also held on with spring clips. With the thin piece removed the outer large bezel can be lifted up and removed.
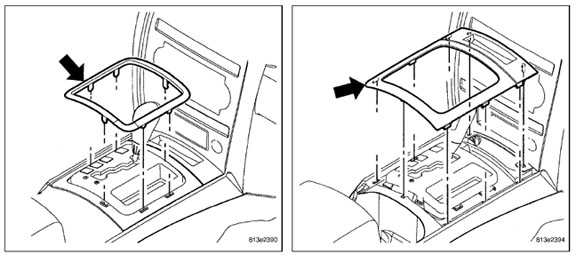
Shifter trim removal
3. With the shifter trim piece removed you can now remove the center bezel. There is a phillips screw inside the cubby hole that is between the power outlets. Once the screw is removed you can pull the entire center bezel trim piece off by hand. Move the shifter to “D” for a little more room. You can now access the wiring for the power outlets.
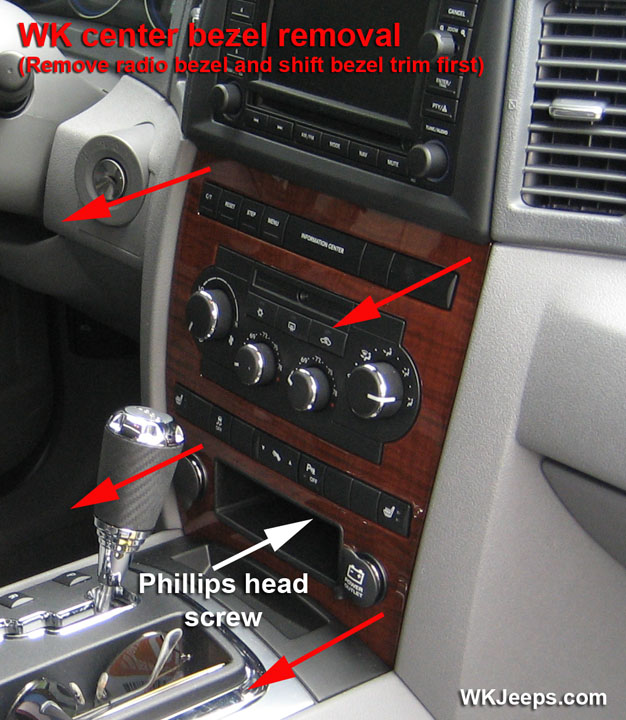
Center bezel removal
Wiring:
For the wiring I used the “direct connect” cable available as an option for the detector. I ran the wiring down the side of the dash, below the A-pillar and then behind the instrument panel.
For the ground wire I found a screw under the steering column to attach it to.
I ran the power wire over to and behind the power outlets, in the centerstack below the A/C controls. I tapped into the + side of the left power outlet which is turned on and off with the ignition.